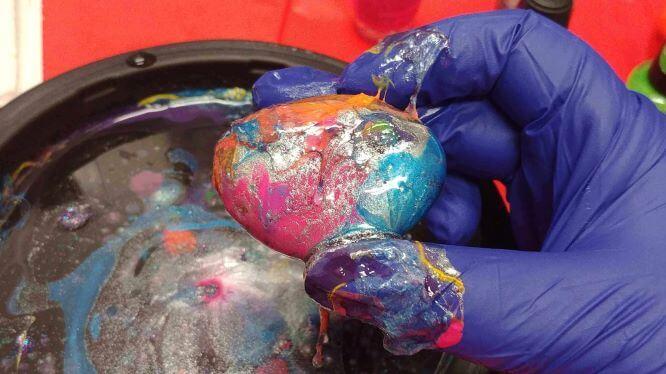
Decorating rocks with unique marble designs is a fun and easy (and a little bit messy) outdoor craft, perfect for a sunny day! Follow these steps to create your own marbled masterpieces!

What You'll Need:
- Some Rocks (ones with at least one large flat side are best)
- Some Nail Polish (lots of different colors!)
- A Dish or Cup of Warm Water (make sure it's big enough for the rock AND your hand to fit)
- Gloves (to keep fingers clean)
- A Chopstick or Toothpick (to swirl the colors)
- Nail Polish Remover (if you change your mind)
- Paper Towels or Rags (to catch any mess)
- Clear Acrylic Sealer (to protect your designs)
Step One: Gather All Your Supplies and Go Outside!
This activity is best done outdoors, or somewhere with really good ventilation, like an open garage. Otherwise the smell of the nail polish can be overwhelming! I put a vinyl tablecloth on a picnic table outside to catch any spilled mess. Fill your dish or cup with lukewarm or warm water: cold water will cause the nail polish to ball up and solidify. Put on your gloves and let's go!
Step Two: Pour the Nail Polish
There are two ways to do this: either by pouring straight from the nail polish bottle, or by dripping it from the brush. Pouring will obviously give you a larger amount of a color, while dripping will just give you a few small dots. What colors you use and how you combine them is totally up to you!
Step Three: Swirl the Nail Polish (Optional)
I did not swirl my nail polish colors very much because I liked the dots of color the way the were. If you do swirl them, make sure you use a very thin chopstick or toothpick so the nail polish doesn't stick to it!
Step Four: Dip Your Rock
With gloves on, pick up your rock by the edges and hold it so the flat side is down. For this step you can either tap the rock gently onto the nail polish to pick up just a little, or dip the whole rock into the water and swirl to cover the edges. (See video below for my technique.) This can get a little messy!

Step Five: Dry and Seal Your Rock
Set your rock aside in a safe place to dry. I set mine on the vinyl tablecloth. Repeat Steps 2-4 for more rocks! Once your rocks are COMPLETELY dry, use a spray clear acrylic sealer to protect them if you're going to leave them outside. It will also make them less sticky for handling. Let them dry again.
Step Six: Display Your Rocks!
Decorate your space with your cool marbled rocks! You can put them out in your garden or porch, or inside on your desk or dresser. I put mine on the ledge next to our window. Where will you put yours?
Find more fun stuff to do and virtual programs to attend with Summer with the Library: Tails and Tales, June 1-August 1! Sign up now!