I can't be the only one out there who forgot that Mother's Day is this weekend (Sunday, May 10 to be exact). For those of you who waited until the last minute like me, I've whipped up tutorial for a DIY photo board that will take an hour or two to make and requires minimal supplies. This is a photo board my mom bought from a store a million years ago:

This is more or less what we're going for, only with supplies you've probably got lying around the house! Continue below for instructions.
A quick note: If you're making gifts for more than one person or are looking for other inspiration, ACLD's eSource Creativebug is a great resource for craft ideas and how-tos. For example, there's a simple Six Pocket Keepsake Book that only requires paper to make (the presenter uses a bone folder to crease the paper, but you can just use the handle of a pair of scissors)! Creativebug also lets you search by craft material, so if you've got limited craft supplies at home this can be a great way to tailor Creativebug's offerings to what you have available.
DIY Photo Board
Materials
- Cardboard, cut to whatever size you'd like (mine was about 11" x 15")
- Yarn, string, twine, thin ribbon, or pretty much anything relatively thin that can be pulled through slits cut in the cardboard (I used yarn in two colors: green and yellow)
- Scissors or a box cutter (only use this if you're comfortable with it and are safe!)
- Ruler
- Pencils/pens (to mark spots for cutting)
- Toothpicks
Optional Materials:
- Paper or fabric (to back the cardboard)
- Thicker ribbon (to create a border)
- Pencils, markers, or paint (to decorate your cardboard)
- Buttons, sequins, or other decorations (to go over the points where the "ribbons" are secured)
- Paperclip (used to pull your "ribbon" through the holes)
Step 1: Cut your cardboard
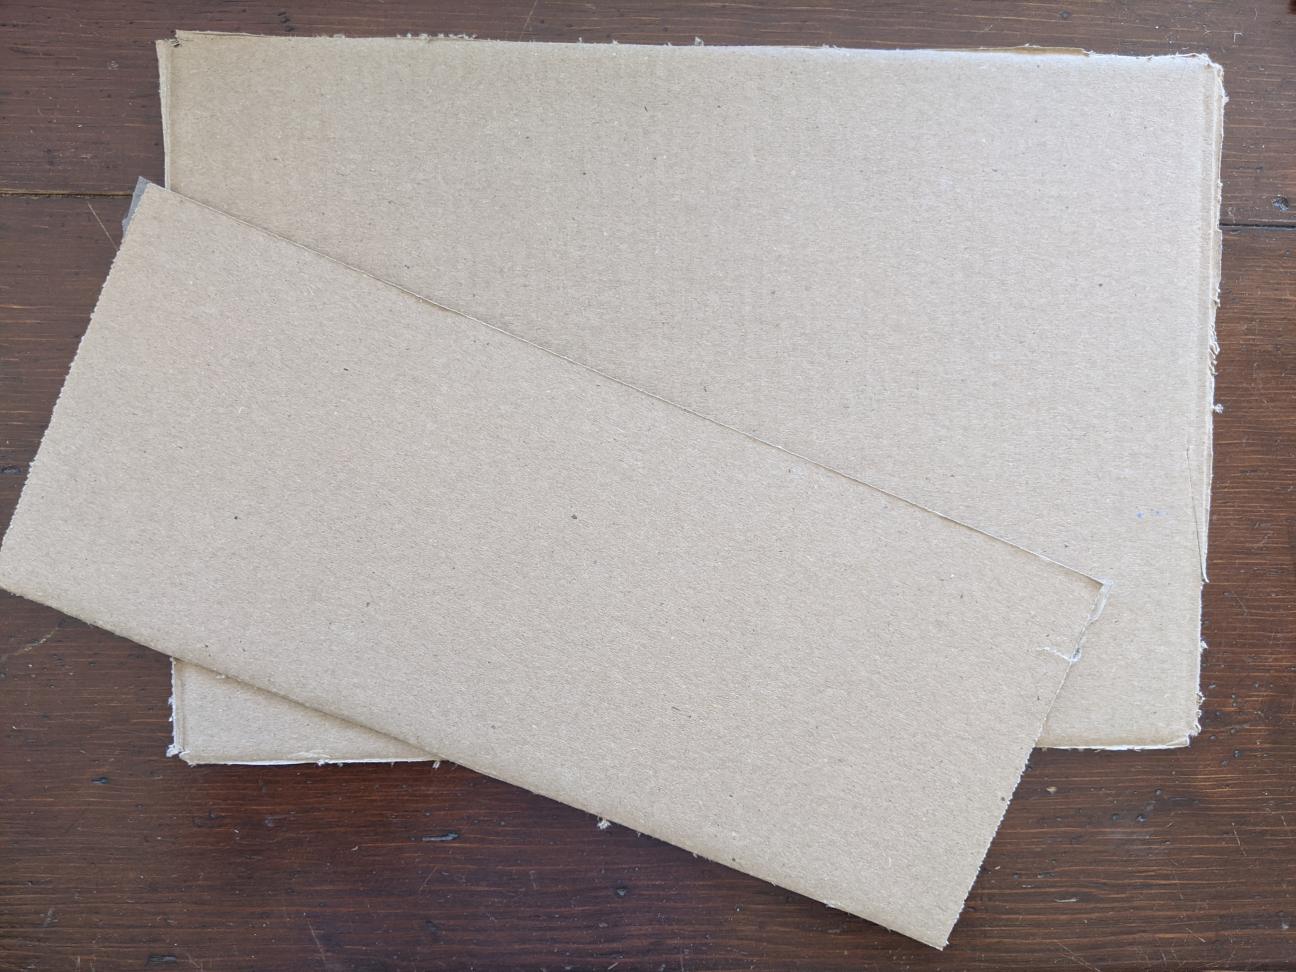
I demolished an old moving box in order to get my backboard, using one of the longer sides. This can be any size that you want, though I do recommend making it big enough that you can get a good border and can have multiple "ribbons" going each direction.
Step 2: Measure your border
I chose to leave a one inch border around the entire photo board, so there would be some extra room for decorations and securing the "ribbons." I measured my board and marked the 1" mark lightly in pen at several intervals on every side. You can see how the border ends up looking in Step 4.
Step 3: Cut and arrange your "ribbon"
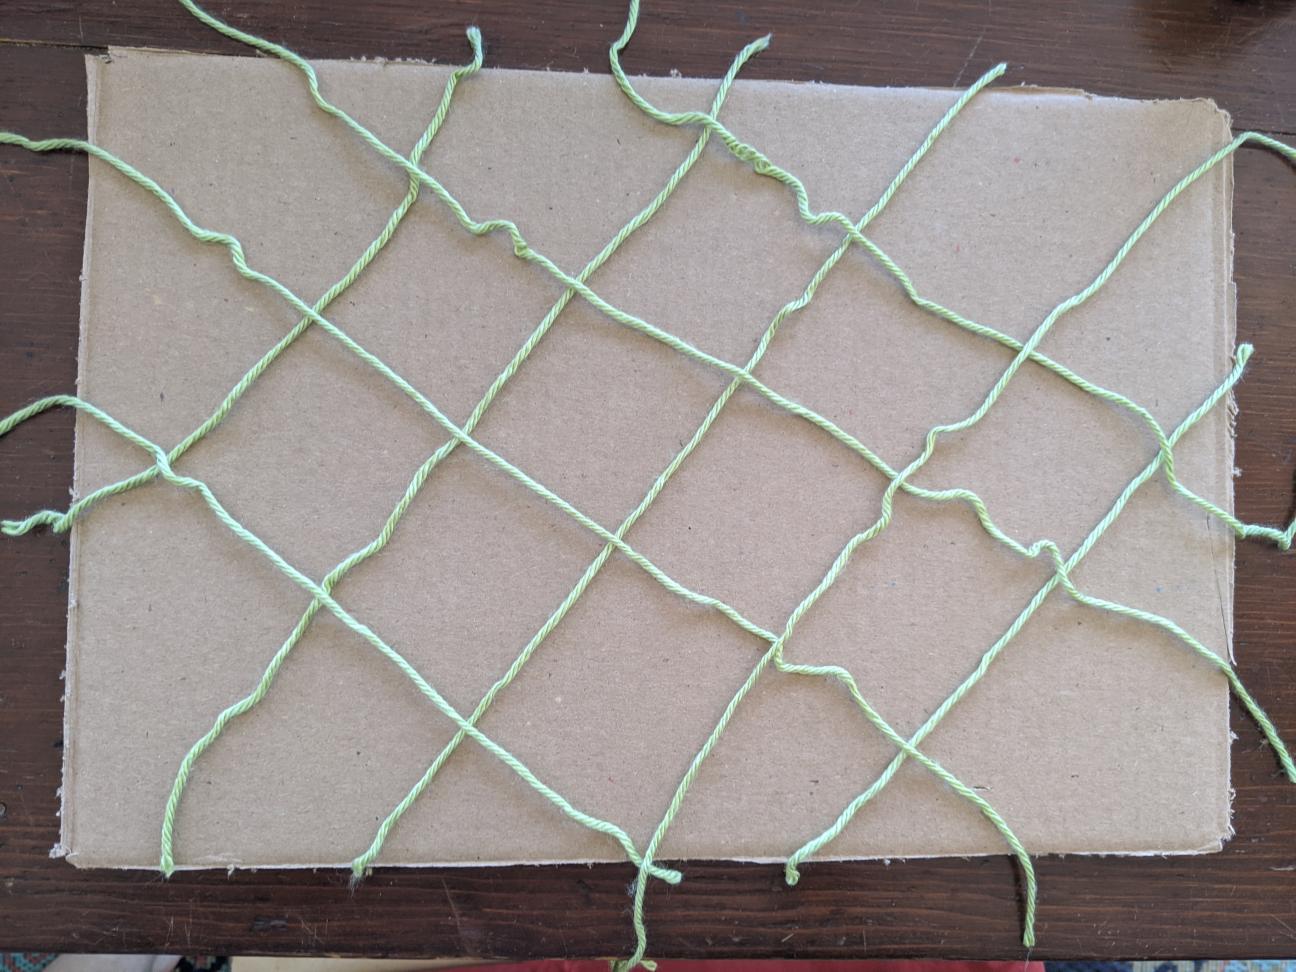
I used yarn because that's what I had handy, but this step applies to whatever material you chose! (For clarity, however, I will refer to it as yarn for the rest of this tutorial.) Cut several strands of yarn to be angled both right and left on the cardboard (I ended up with 5 strands that were angled right and 6 strands angled left). Make sure you cut the yarn long enough that you have excess—you'll need it!
Once that's done, we're going to move on to securing the yarn.
Step 4: Cut slits to secure your yarn
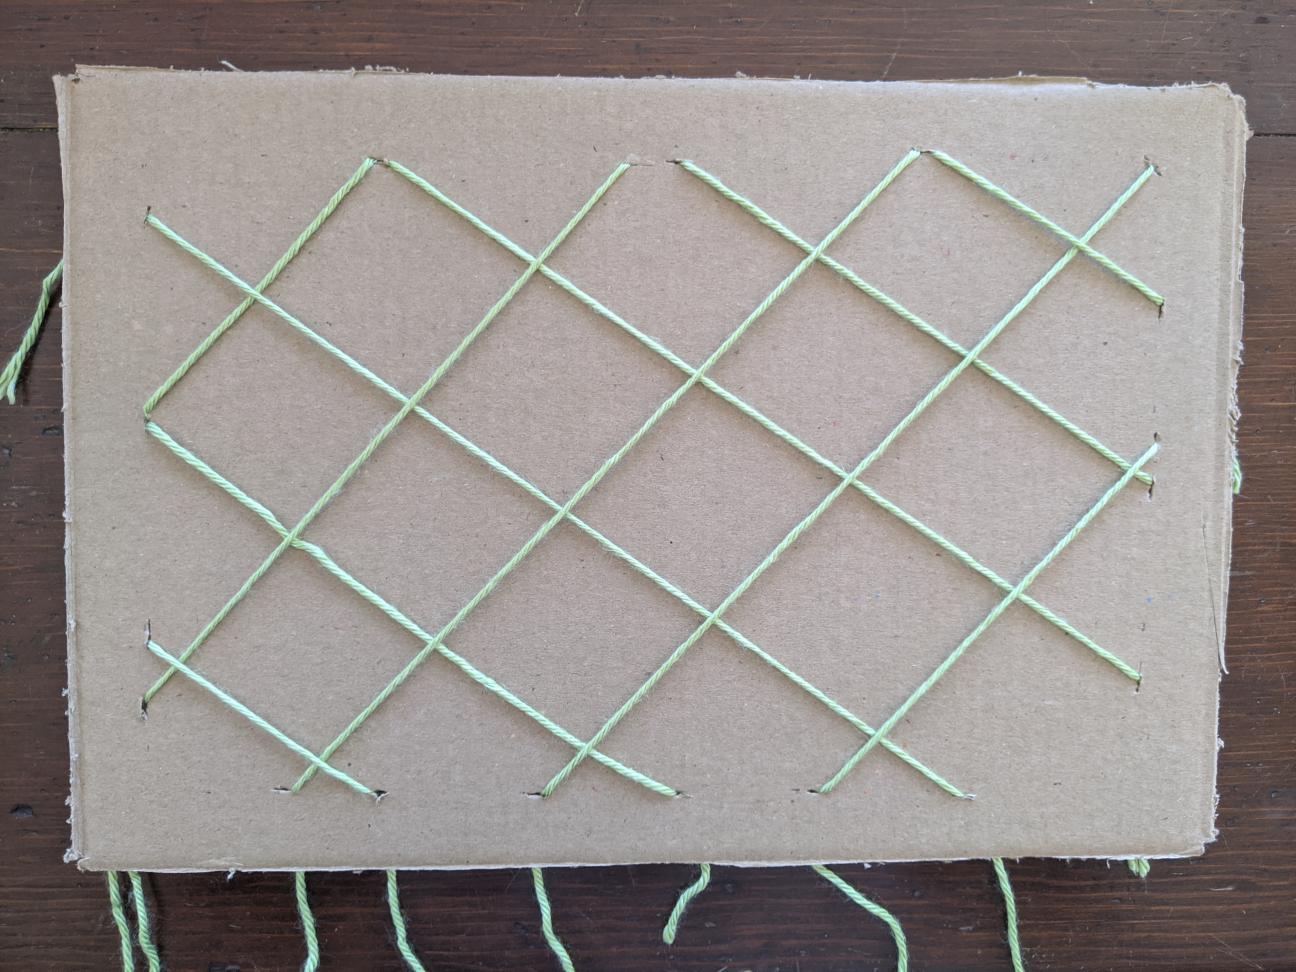
Between the photos for the last step and this one, I added a few extra strands of yarn, so there would be more points of overlap.
Using your scissors or box cutter, cut a small slit at every point where your yarn overlaps with the "border" (for me, that's 1" in from the edge). This can be approximate—after all, it's a homemade gift! Then, pull the yarn through each slit. I would recommend leaving the yarn on top of the board a little loose, because you'll need to pull it through a few other sets of slits in the next step.
A Tip: Use an unbent paperclip to pull your yarn through the slits! The paperclip that I used ended up looking like this, with a small hook on one end:

I inserted the hook end of the paperclip from the back of the board to the front, hooked the yarn, and then pulled the entire yarn end through the slit to the back. It's the same method I used for the next steps as well, and I've got photos for those of you who, like me, learn better visually:
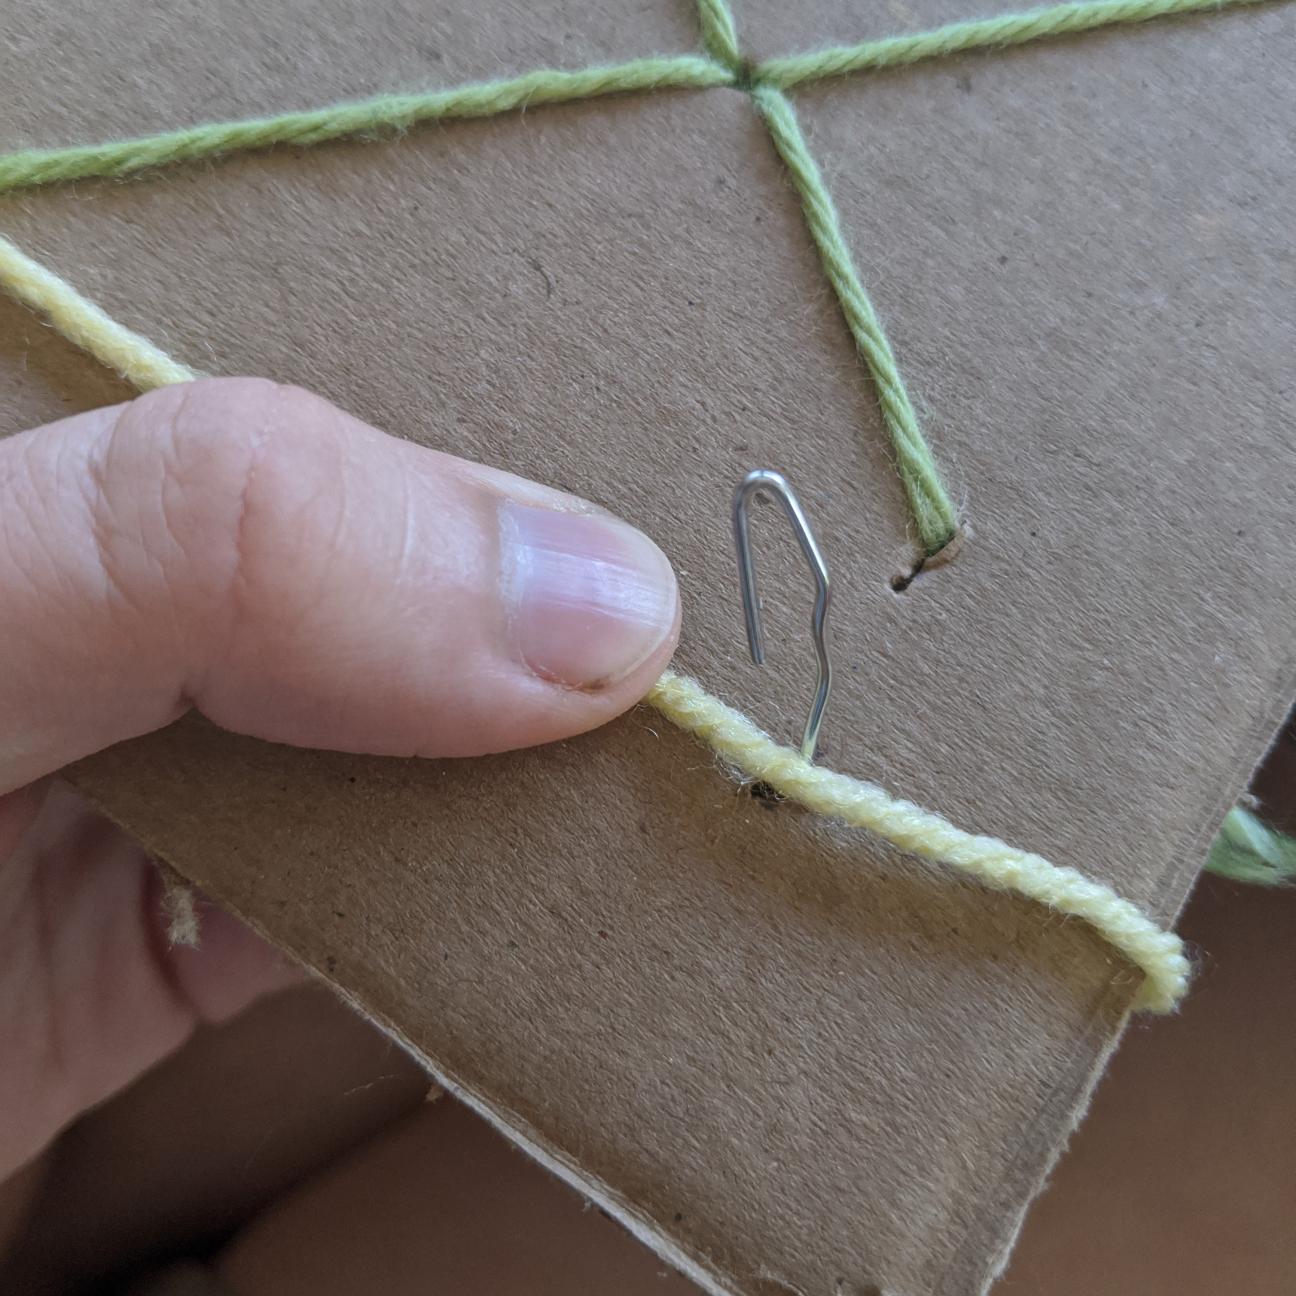
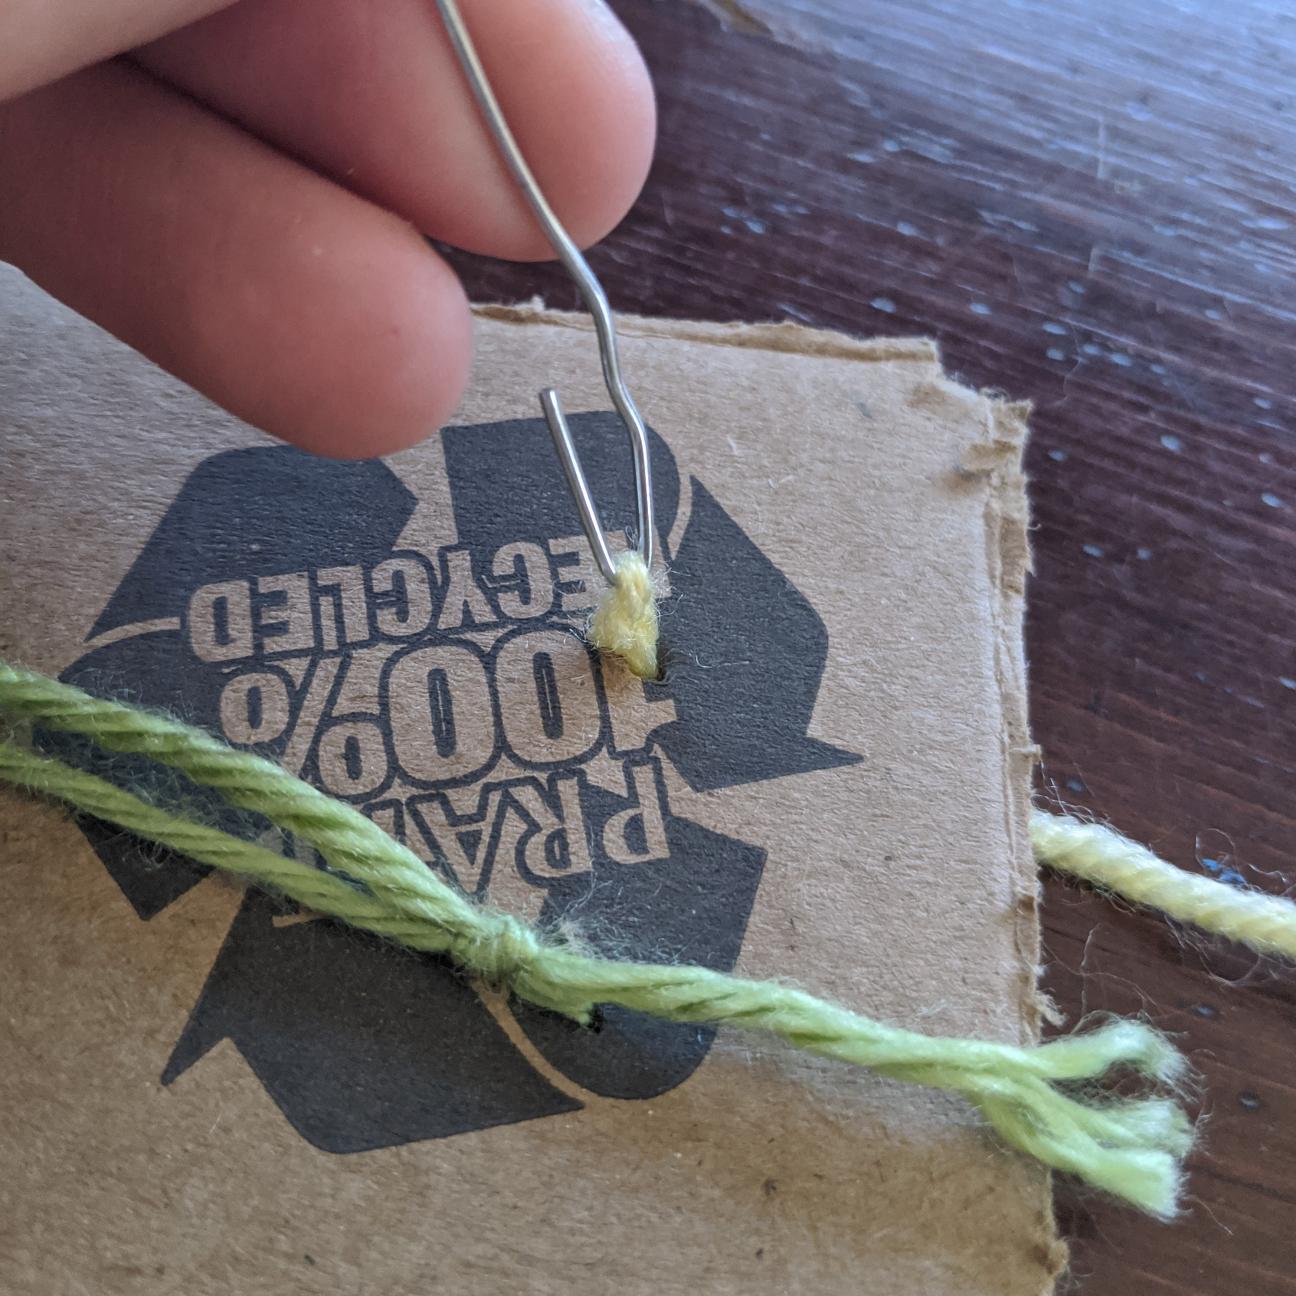
These particular pictures were for the border yarn (we'll get to that in a bit), but for this step, you want to pull the ends of the yarn all the way through the slits (you can see some green yarn ends in the second picture that have been tied together).
Step 5: Secure overlap points
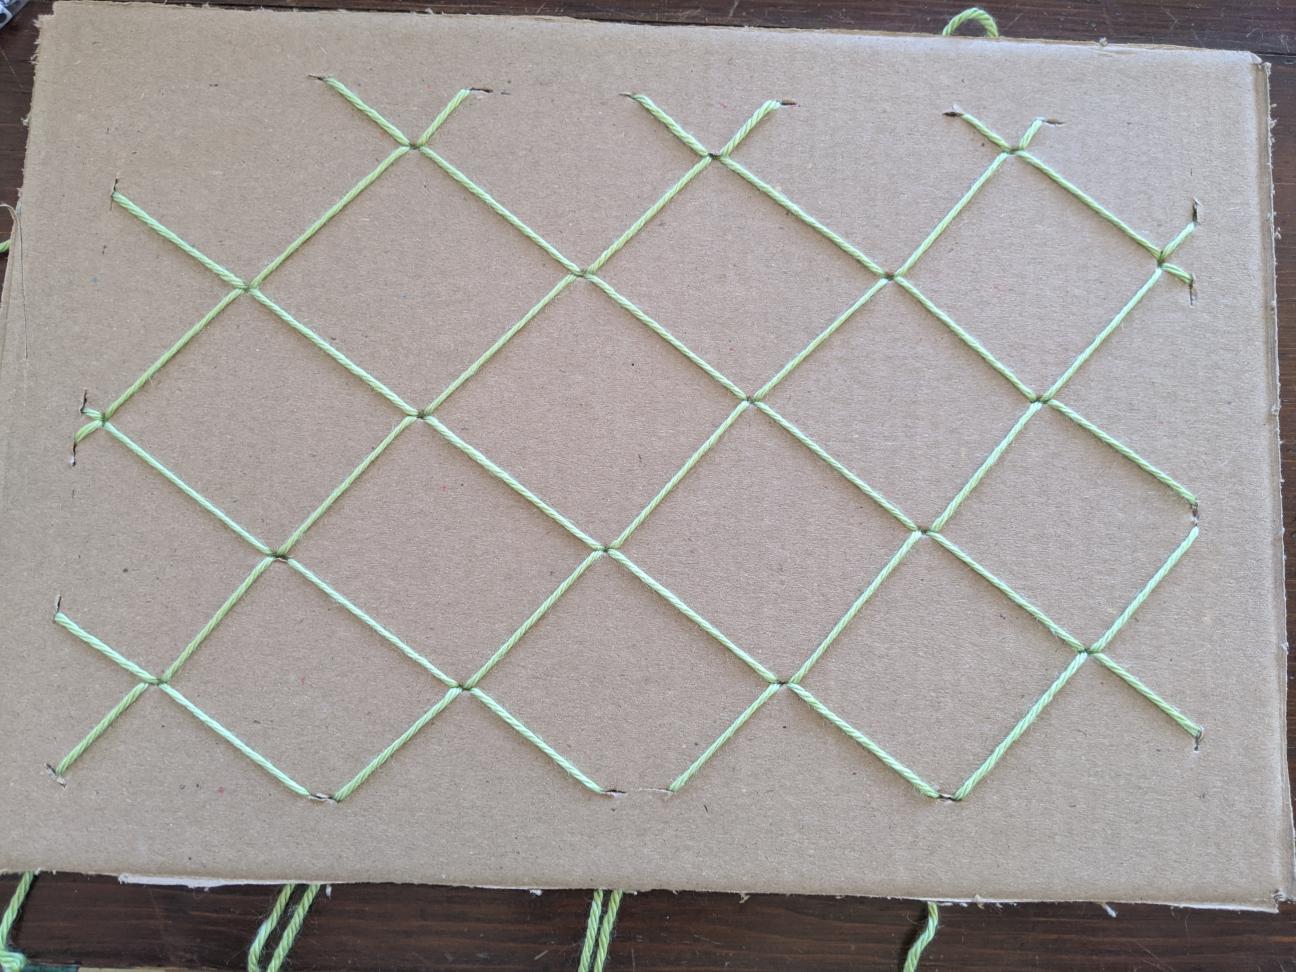
In this step, you're going to cut slits and secure each point where the strands of yarn overlap. As you can see in the previous step, I had 18 points of overlap. In this step, I used a pink colored pencil to mark the points where the yarn overlapped, and then moved the yarn out of the way to cut a slit using my box cutter. I then pulled both strands of yarn through the slit, using the same paperclip method I detailed in the last step.
In order to secure the yarn, once I had pulled the yarn through to the back of the cardboard, I inserted a toothpick into the loop created by the yarn, and then withdrew the paperclip. After I flipped the cardboard back over, I pulled gently on the yarn to make sure the toothpick was held taut. In the photo above, you can see where the yarn seems to disappear into the cardboard. That's where the toothpicks are. This is what the toothpick step looks like:

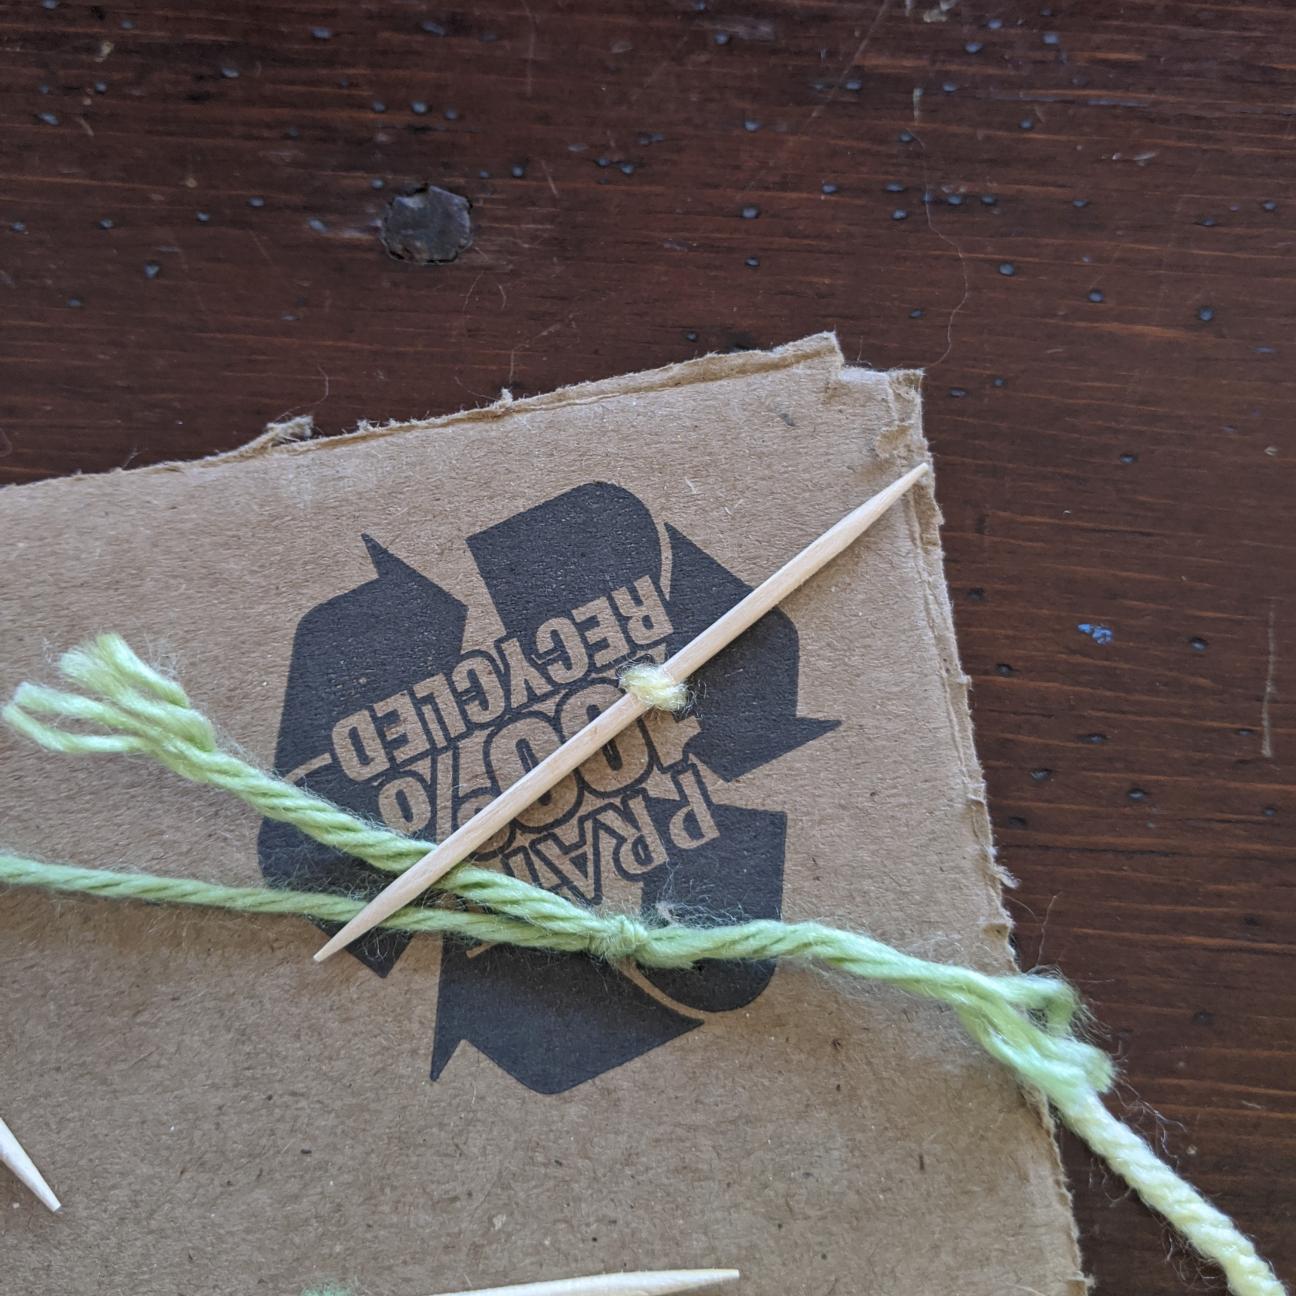
Note: when you're doing this for the overlap points, you will have two strands of yarn in your loop, rather than one.
Step 6: Secure yarn ends
As you can see in several photos above, once all of my overlap points were secured, I flipped the cardboard over and double knotted the green yarn ends together, to keep them from pulling out as photos are put in the photo board. For ends that had gone in the same slit at the beginning (as you can see in the photo for Step 4, there were 4 such points), I added a toothpick before knotting the yarn, to keep them more secure.
*Every step after this point is completely optional! Even if you don't continue, you should have a fully functioning photo board at this point!*
Step 7: Yarn border

Because I don't have access to any actual ribbon, I decided to run a yellow yarn border along the "edge" of the photo board (approximately 1" in from the edge of the cardboard). For this, I cut a small slit at the 1" mark in each the four corners. I then cut a very long strand of yellow yarn, and started by pulling one end entirely through one of the slits. I then ran the yarn to each of the next corners, securing it through the slit with the paperclip/toothpick method outlined above. When I got back to the first corner, I cut the yarn to a reasonable length, pulled the end entirely through the slit, and tied the two ends together with a toothpick to secure the knot.
I put in some photos of my brother and I when we were young, along with a note for my mom. But I decided it was still a bit too simple, and added some more decorations.
Step 8: Decorations

My decorations included gluing a button down at each spot where the yarn strands overlapped (a total of 18 buttons), and I also used a green permanent marker to color the 1" border. As you can see, it really brings the whole thing together, and you can definitely personalize it to the person you're making it for—add sequins, ribbon, paint, or anything else you can think of!
The back ended up looking like a bit of a mess (I'd include a photo, but there's a huge store logo in the middle of my cardboard). If you'd like to make the back prettier, you can glue paper or fabric down over the yarn and toothpicks. Additionally, you can make a stand out of more cardboard, or add sticky tabs to hang it somewhere.
I added the photos back in, and this was the final result. When you're putting your photos in, be careful not to dislodge any of the decorations you added.
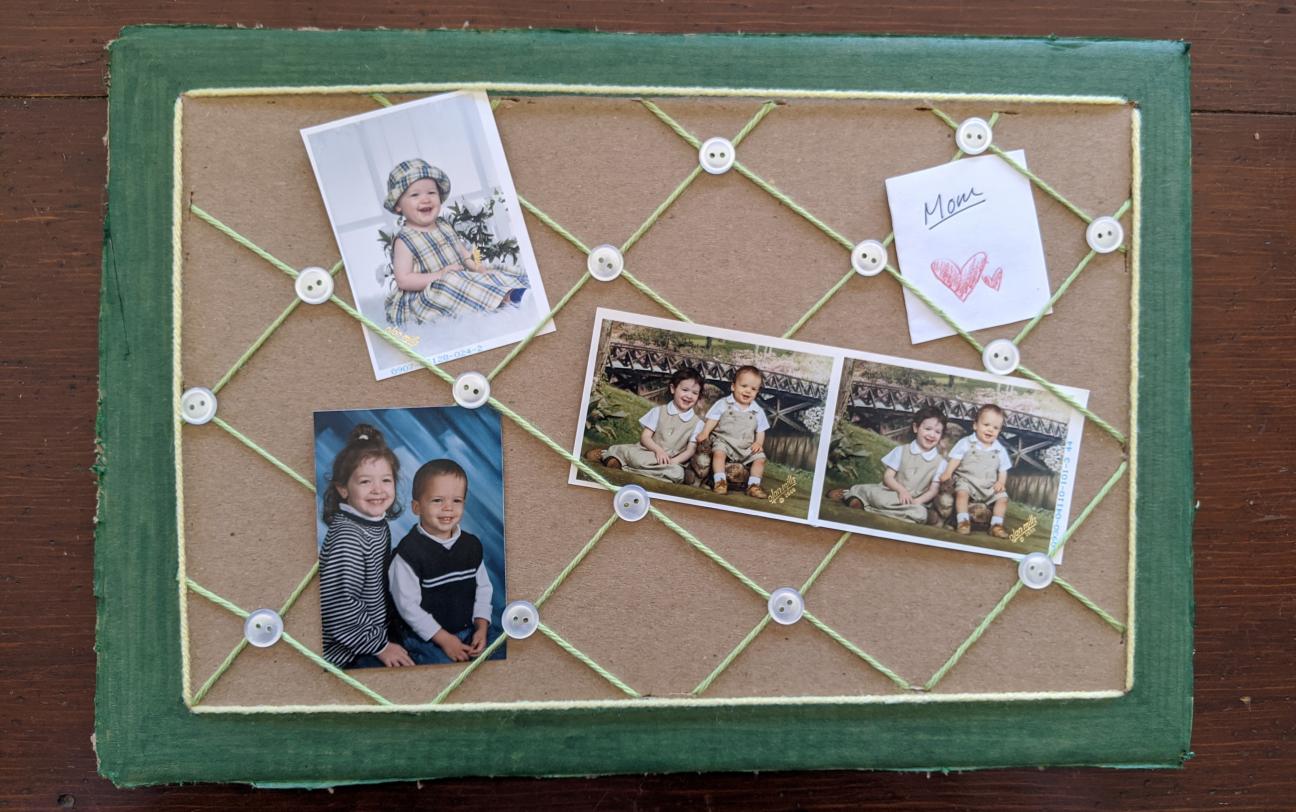
Now go forth and create! And a Happy Mother's Day to any mothers who may be reading this, or any mother(s) that you make this craft for.