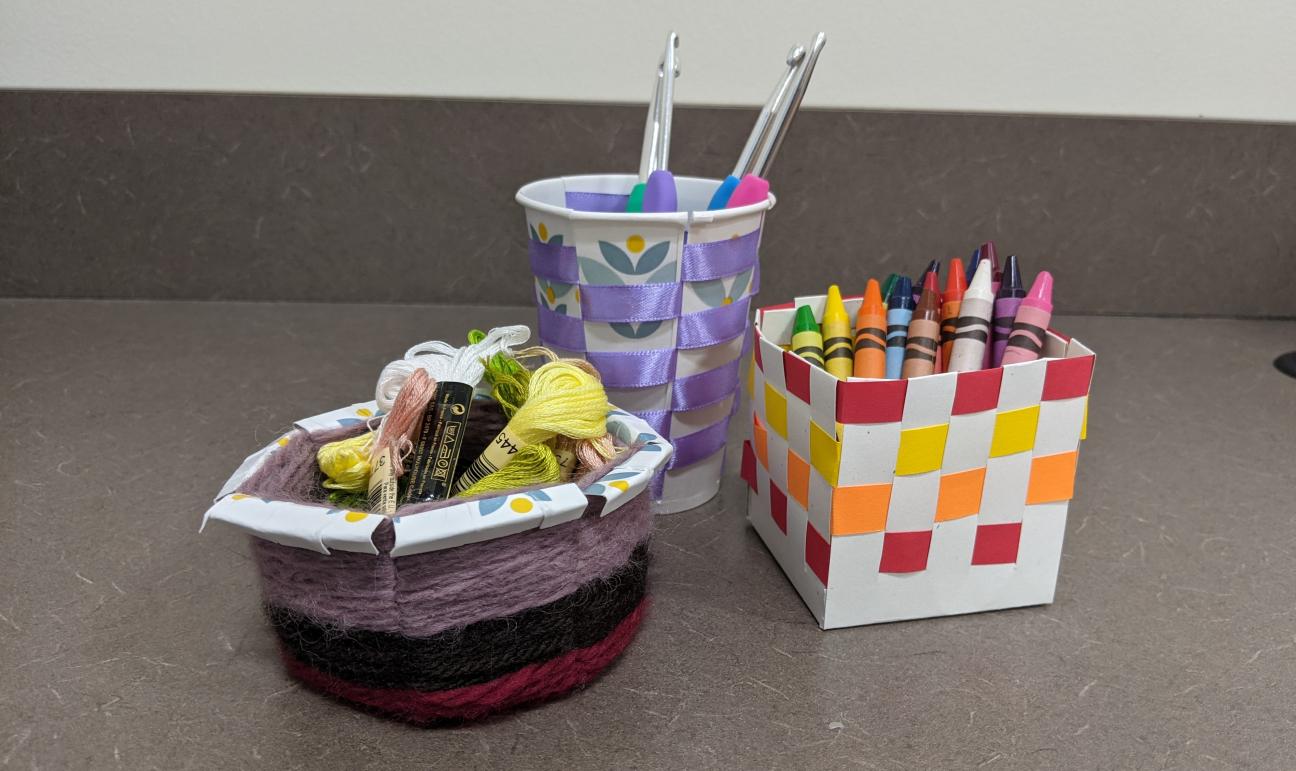
There are lots of ways you can weave baskets using supplies you probably already have at home. Your baskets can be round or square, big or small, and any color of the rainbow. You’re only limited by your imagination and the supplies you have on hand!
With this tutorial, I’ll show you step by step instructions for three different basket styles. Keep scrolling to find the style you like, or give all three a shot!
Style #1: Short Yarn Basket
Supplies: yarn, paper plate, pencil or marker, glue
Instructions: A lot of the instructions in this section are useful for the later baskets, so I won't repeat them again below. Make sure to come back here if you have questions later!
Step 1
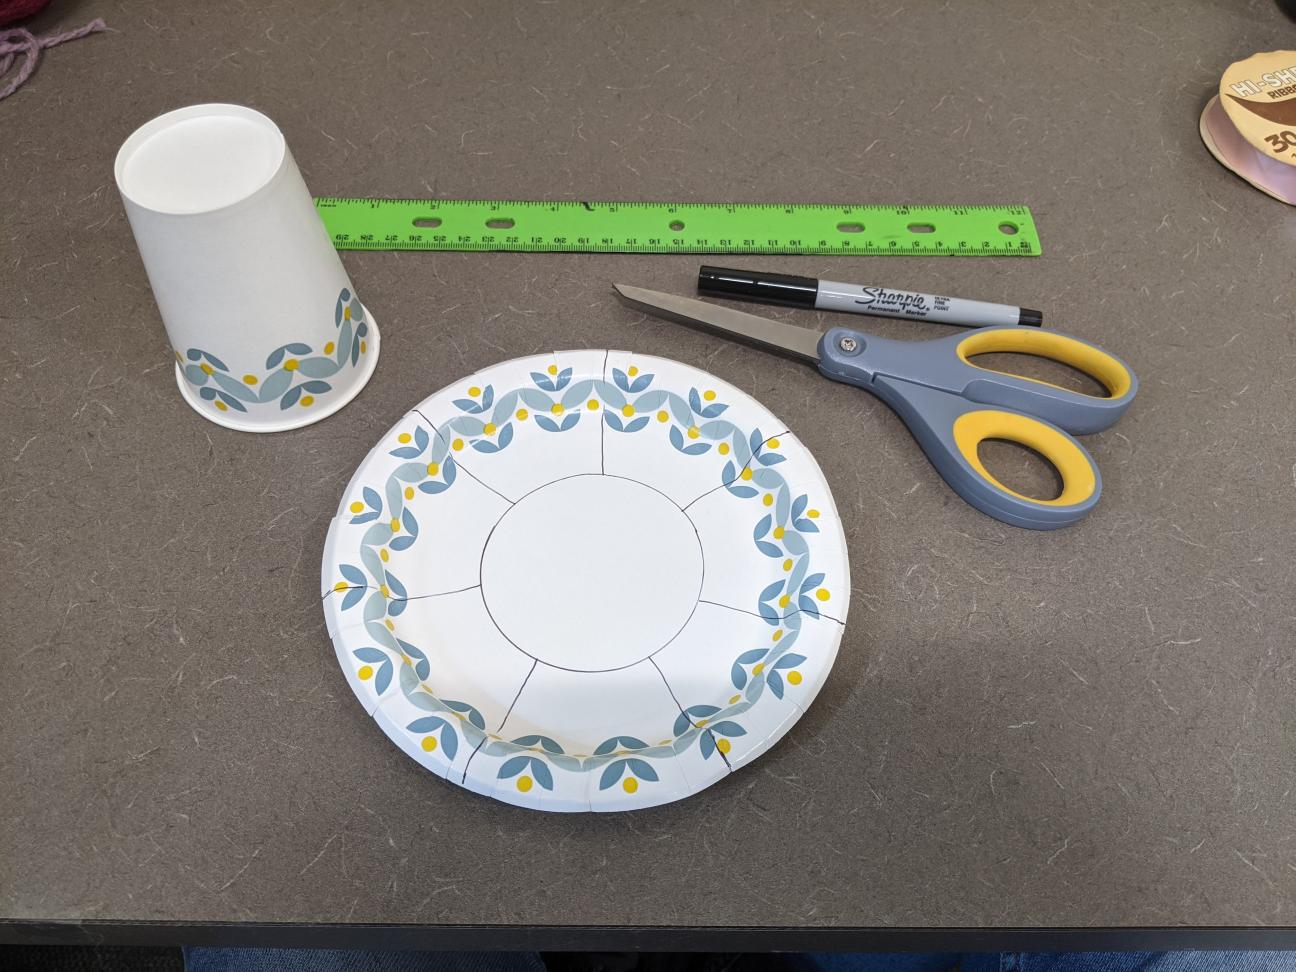
Draw a circle in the middle of your paper plate. You can use just about anything that's smaller than the plate as a stencil –I used the top of my paper cup- or just freehand it!
Step 2
Divide the outer edge of the plate into equal sized sections or panels. Important note: you need an odd number of sections if you don’t want to end up with gaps in your basket!
Step 3
Cut along each line, stopping when your scissors reach the circle in the middle. After that, cut out the sides of each panel, so that there's a V-shape between each panel. Try bending the sides of your basket up. If your sides overlap at all, cut more off your plate panels in order to make the V-shape bigger. This will help us with weaving later.
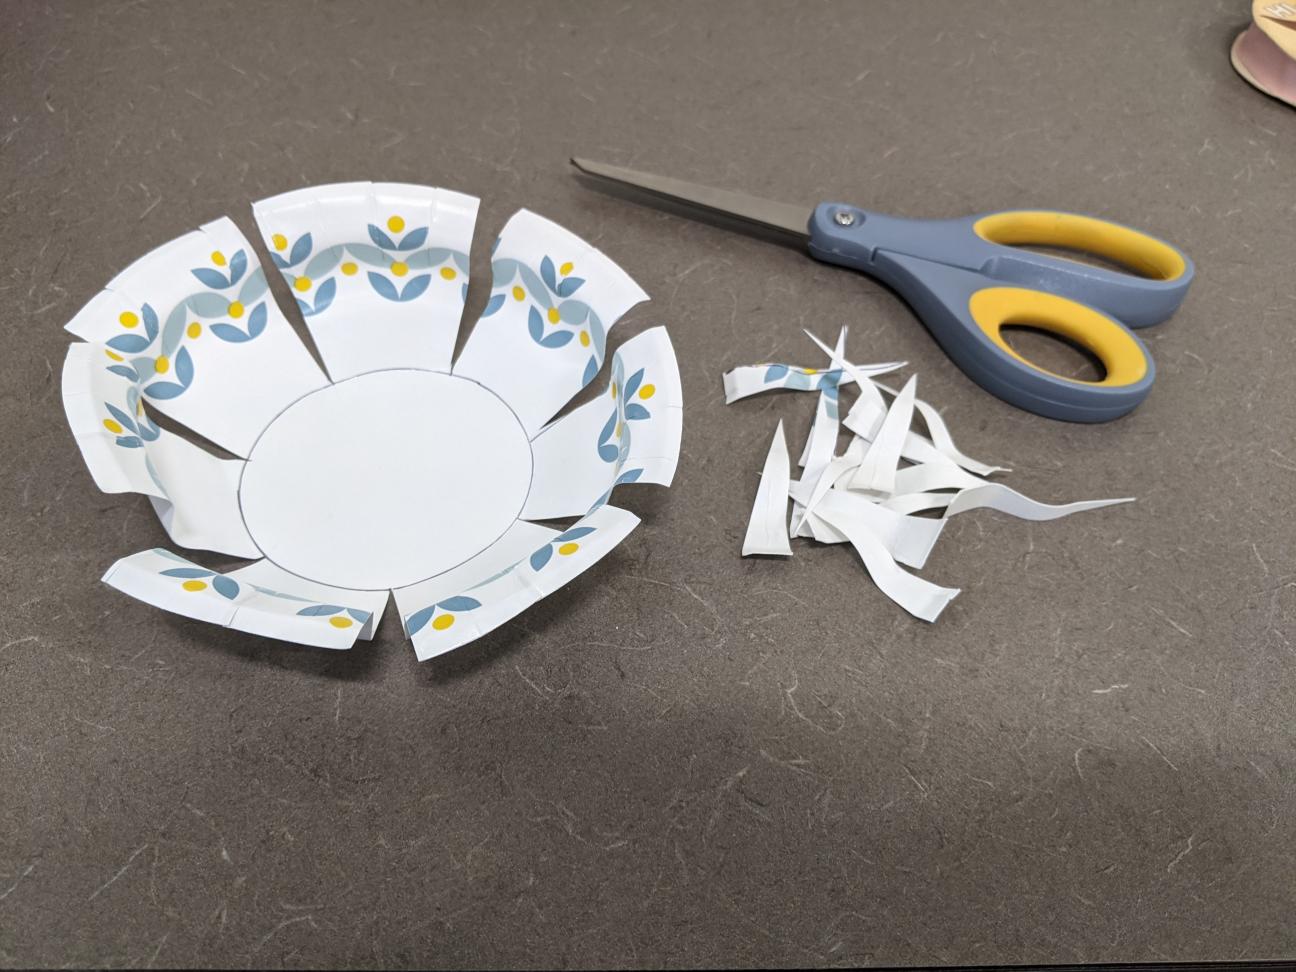
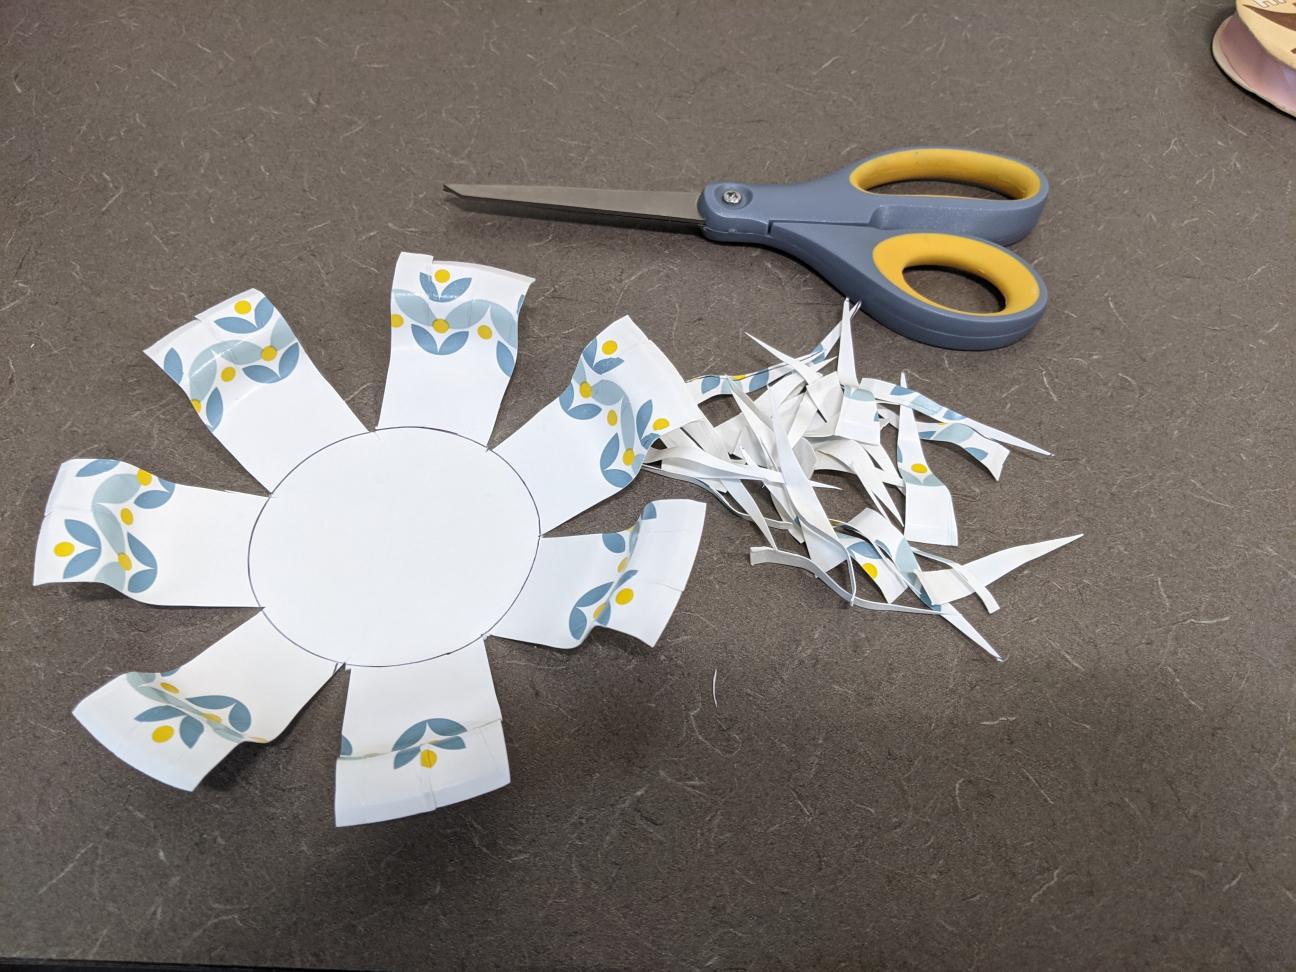
Step 4
Next, it's time to start weaving our yarn! Put the end of the yarn so that it's on the inside of your plate (you can see what that looks like in the left picture below). Either hold or tape the end yarn end in place, then take the rest of your yarn and move it to the outside of the basket. At the next space between panels, move it back to the inside of the basket. Keep going around the circle, alternating between inside and outside the basket at each panel. When you get to the end of your first circle (also called a "round" in knitting and crochet), you'll actually end up with two panels right next to each other that have yarn on the outside. That's okay! That needs to happen in order to have our yarn alternating.
Step 5
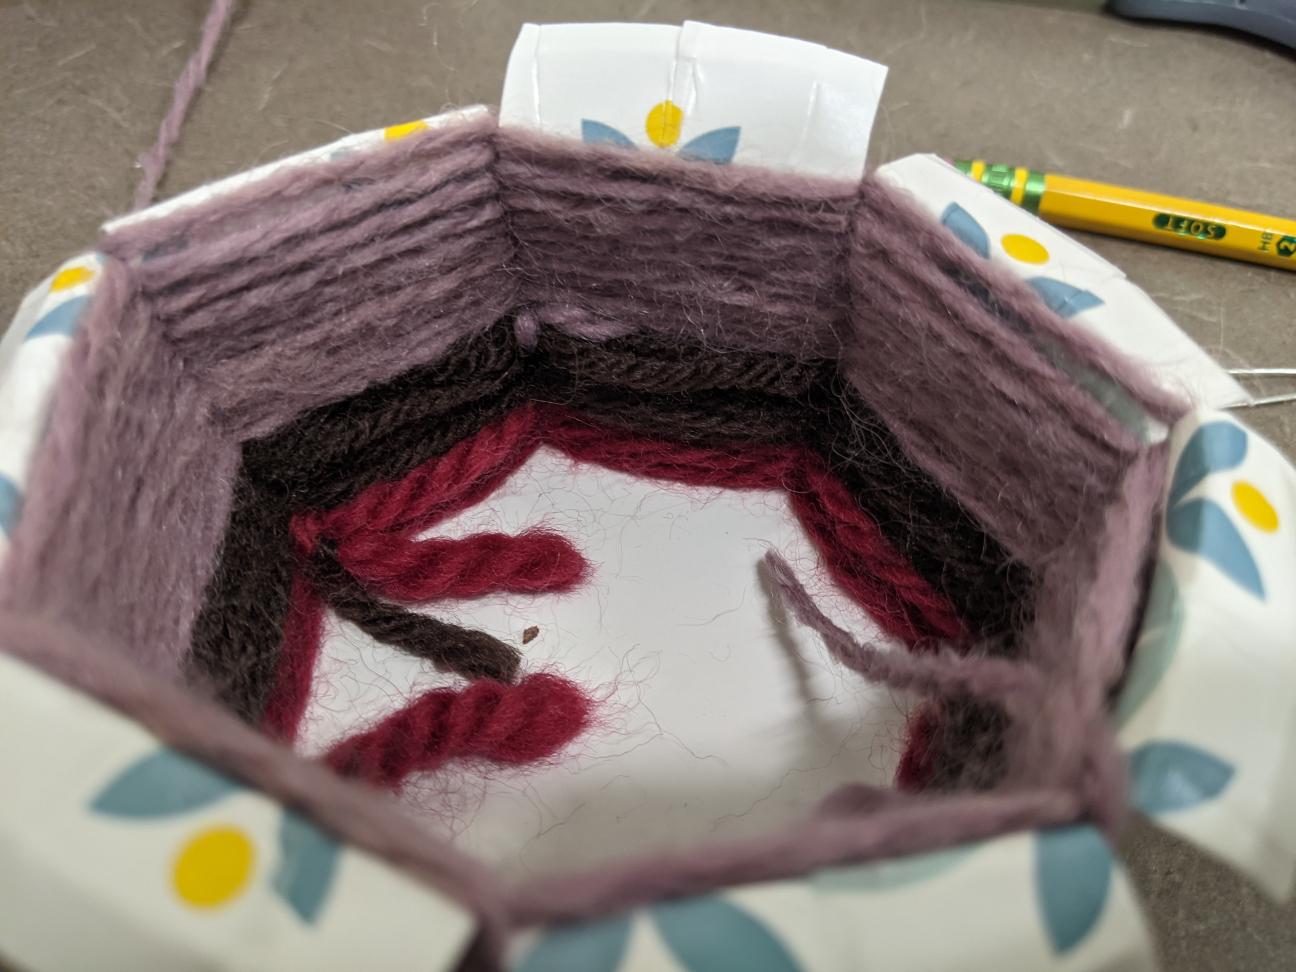
Keep going! As you can see in the middle photo below, by the time you've gone around twice, you'll have yarn on the inside and outside of each panel. If you have a hard time keeping the yarn down by the base of the plate, push it down with your fingers. If you decide that you want to change colors, pull your yarn to the inside of the basket and cut it so there's a long end. Then, start with your new color the same way you did with the first yarn. Once you've woven it around a couple of the sides, you can go back and tie together the end of the old yarn and the end of the new yarn. This will keep your new yarn from slipping as you work, or your old yarn from falling out.
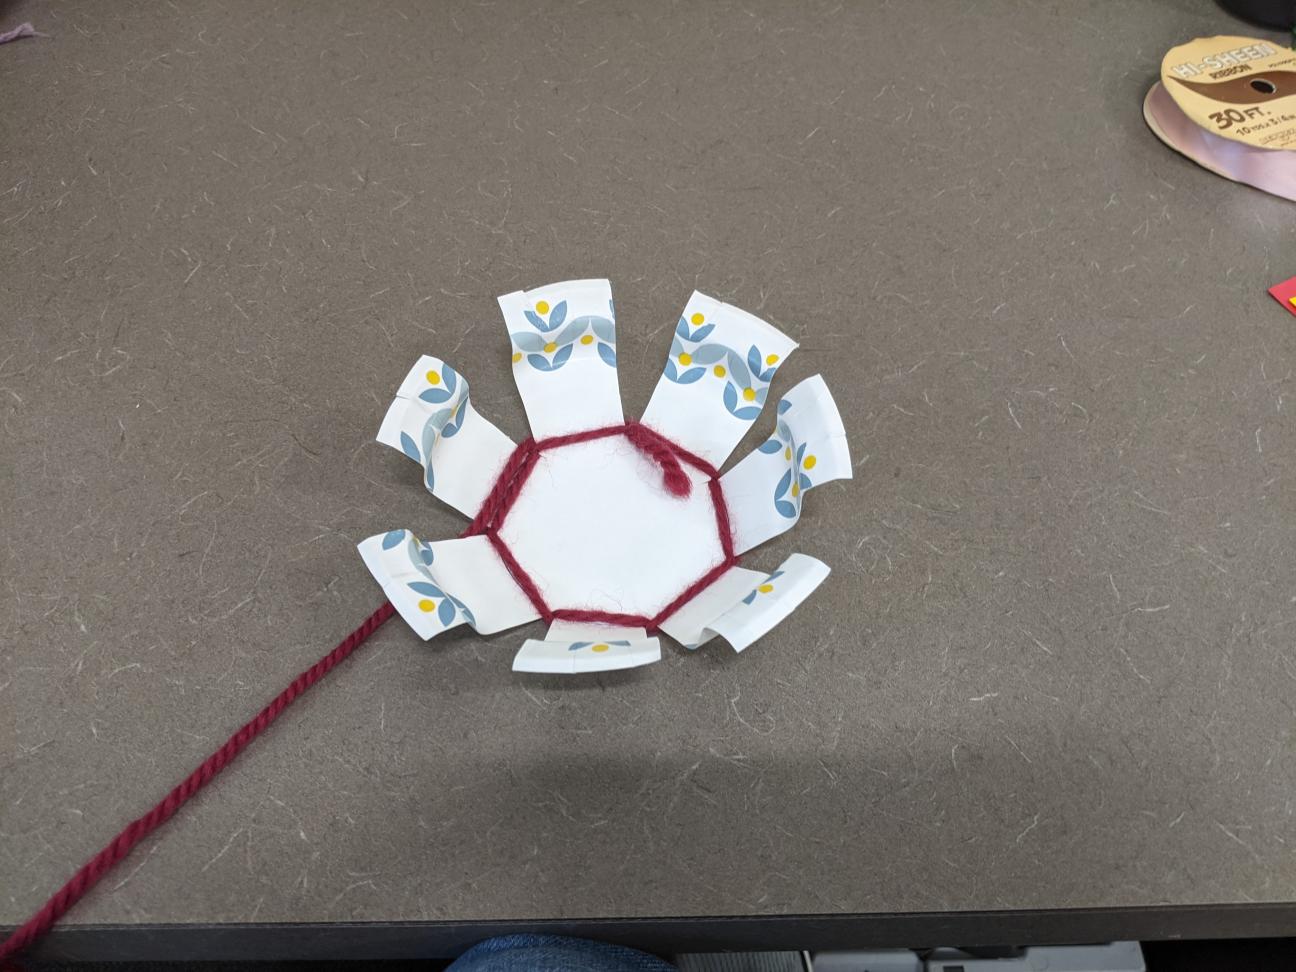
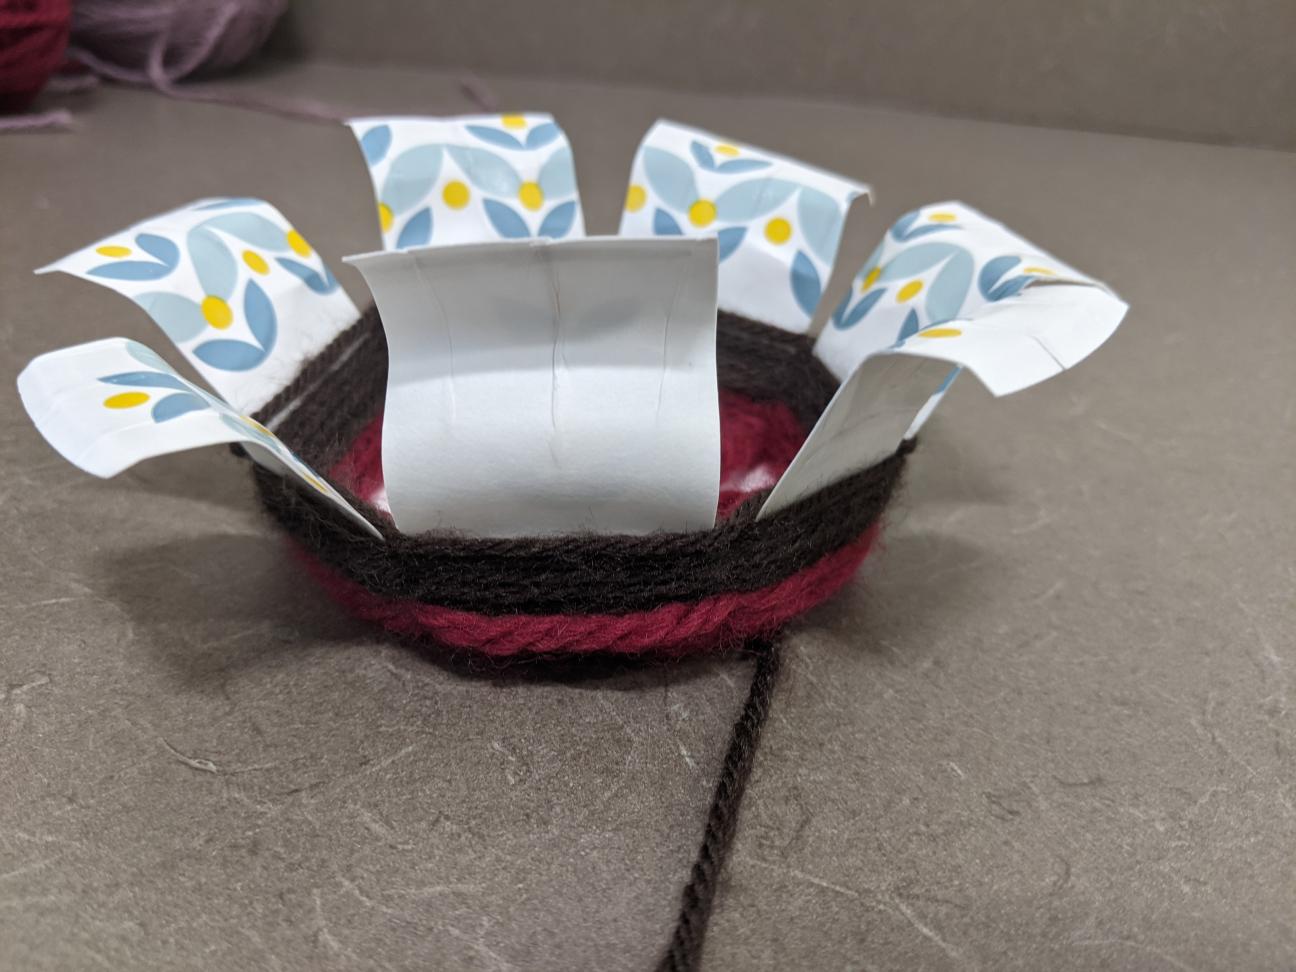
Step 6
When you're close to the top, you can cut your yarn with a long tail and tie it to one of the strands from an earlier round so it stays put. Now, if you changed colors before, you might have a bunch of yarn ends sticking out. Yuck! We don't want to see those. Use a paperclip or pencil to push the ends behind the yarn on the inside of the basket. It might be hard to get any that are close to the bottom of the basket, but it'll look much nicer once it's done!
Step 7
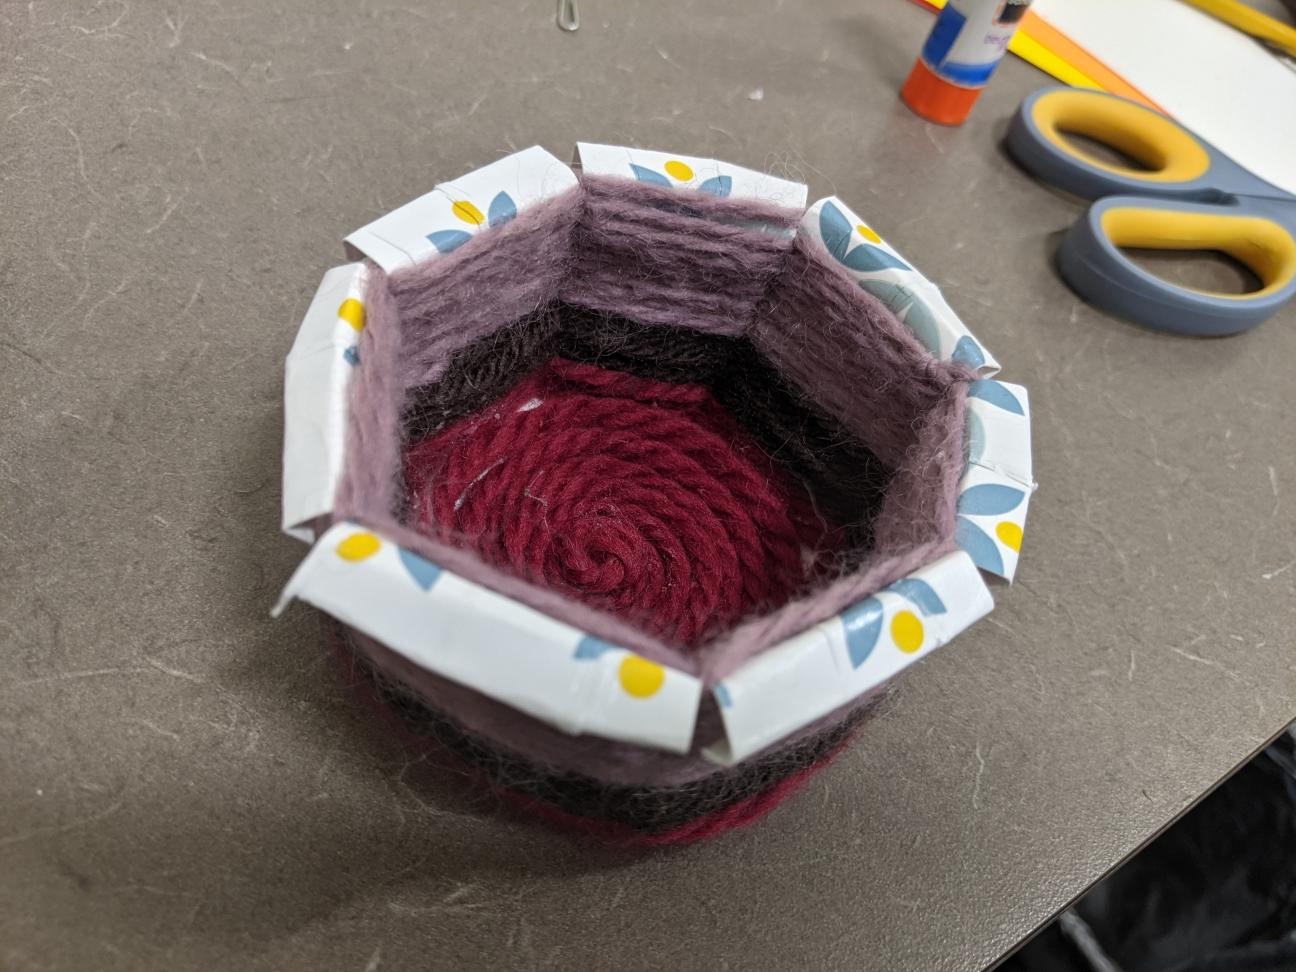
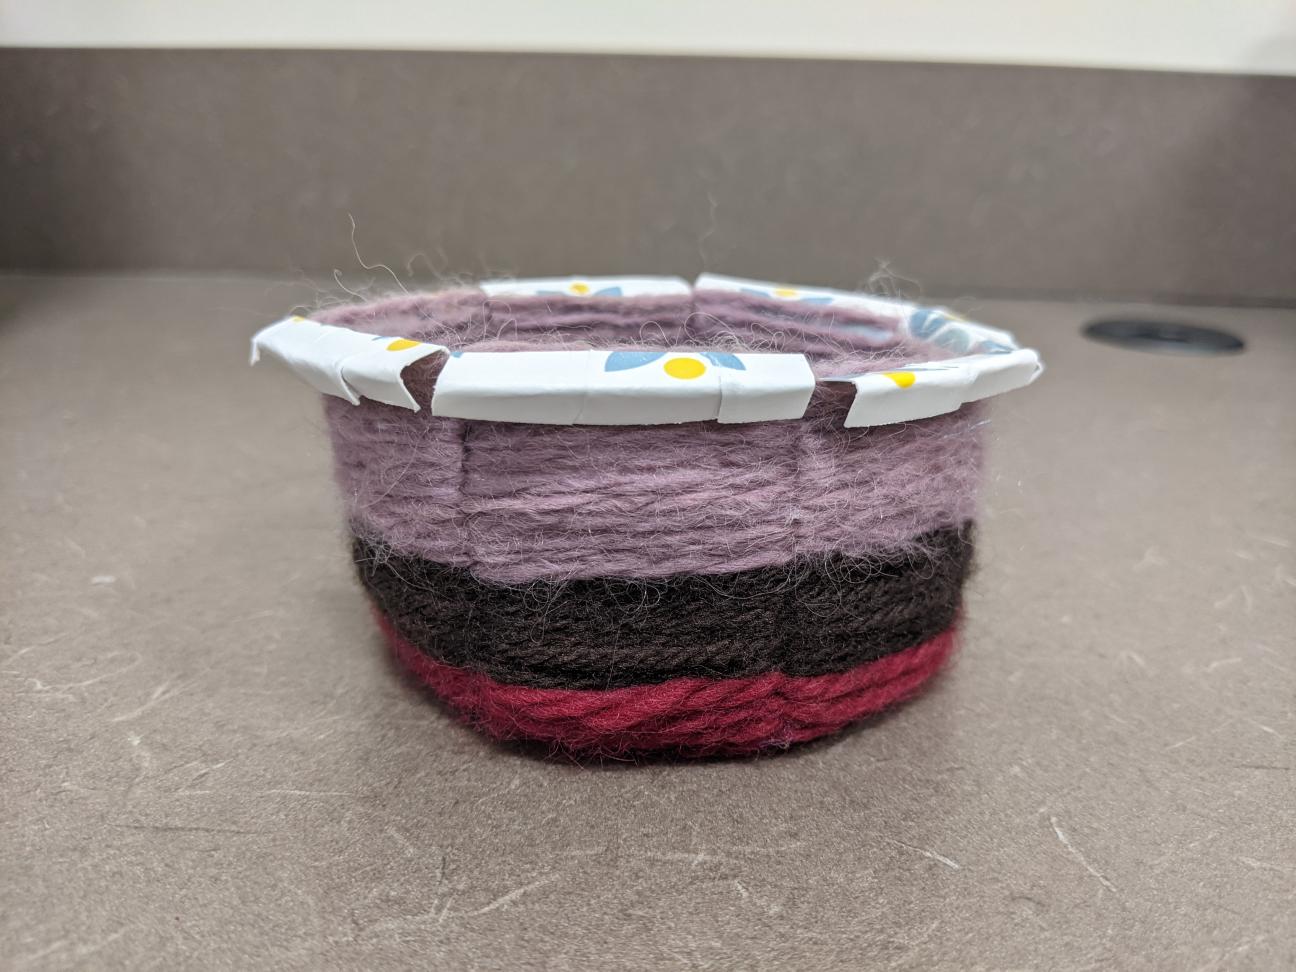
Lastly, you'll want to curl over the edges of your plate. This is to help keep the yarn in place. If your plate has a decorative edge, like mine did, that can add to the look of the basket. I curled my edges under twice because they were sort of long, but do what works best for your basket!
Step 8
If you’d like, you can also use yarn or a piece of felt to cover the inside base of the basket! I put some Elmer's glue on the base of the plate and then coiled a piece of yarn around so it made a nice spiral.
Style #2: Tall Ribbon Basket
Supplies: paper cup, ribbon, scissors
Step 1
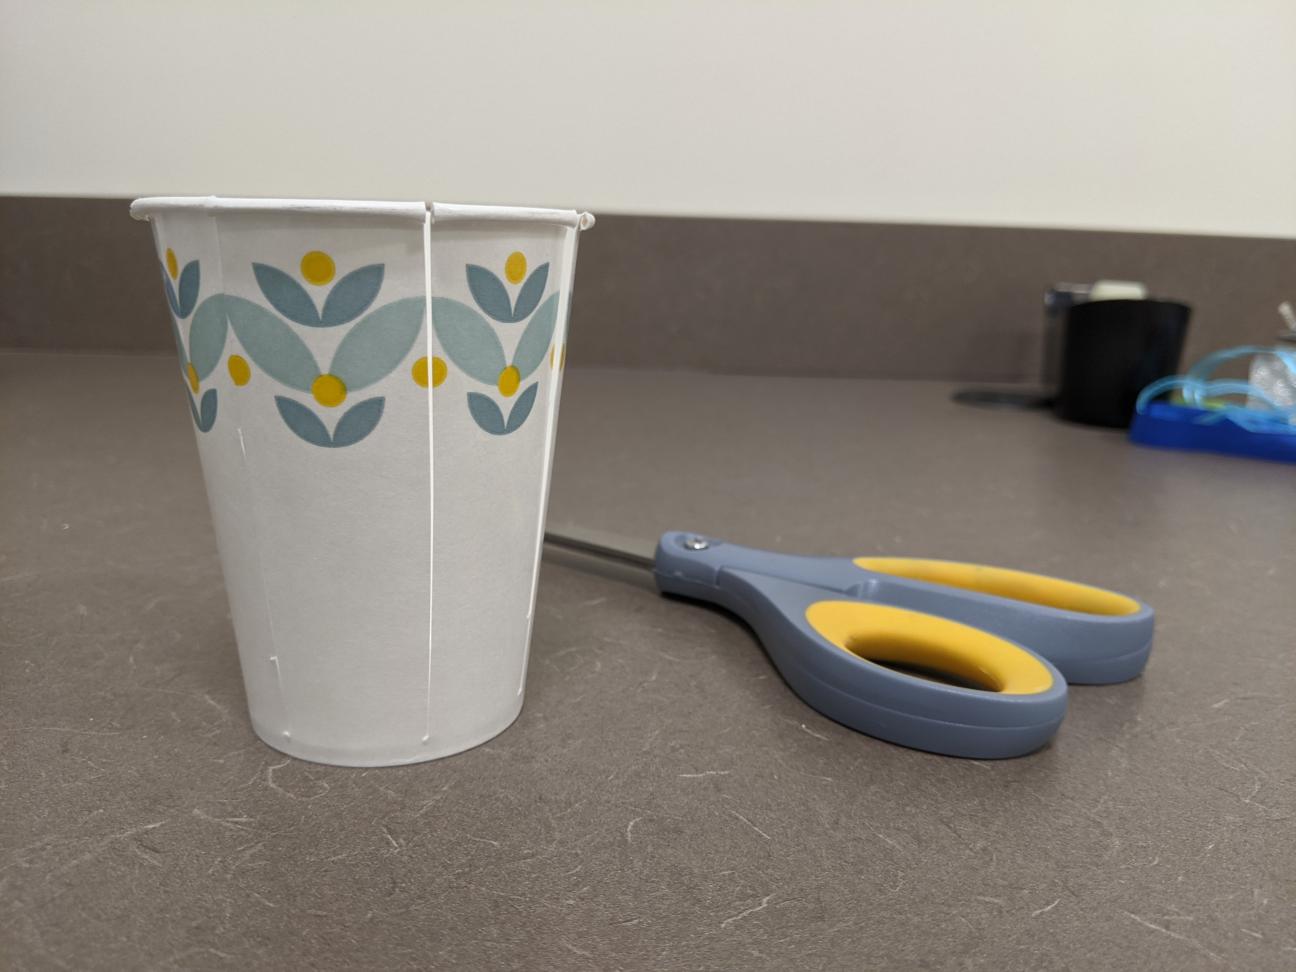
Cut your cup. Again, you should have an odd number of sections. You don't have to make the sections V-shaped, because the cup is already shaped like a basket instead of a flat plate.
Step 2
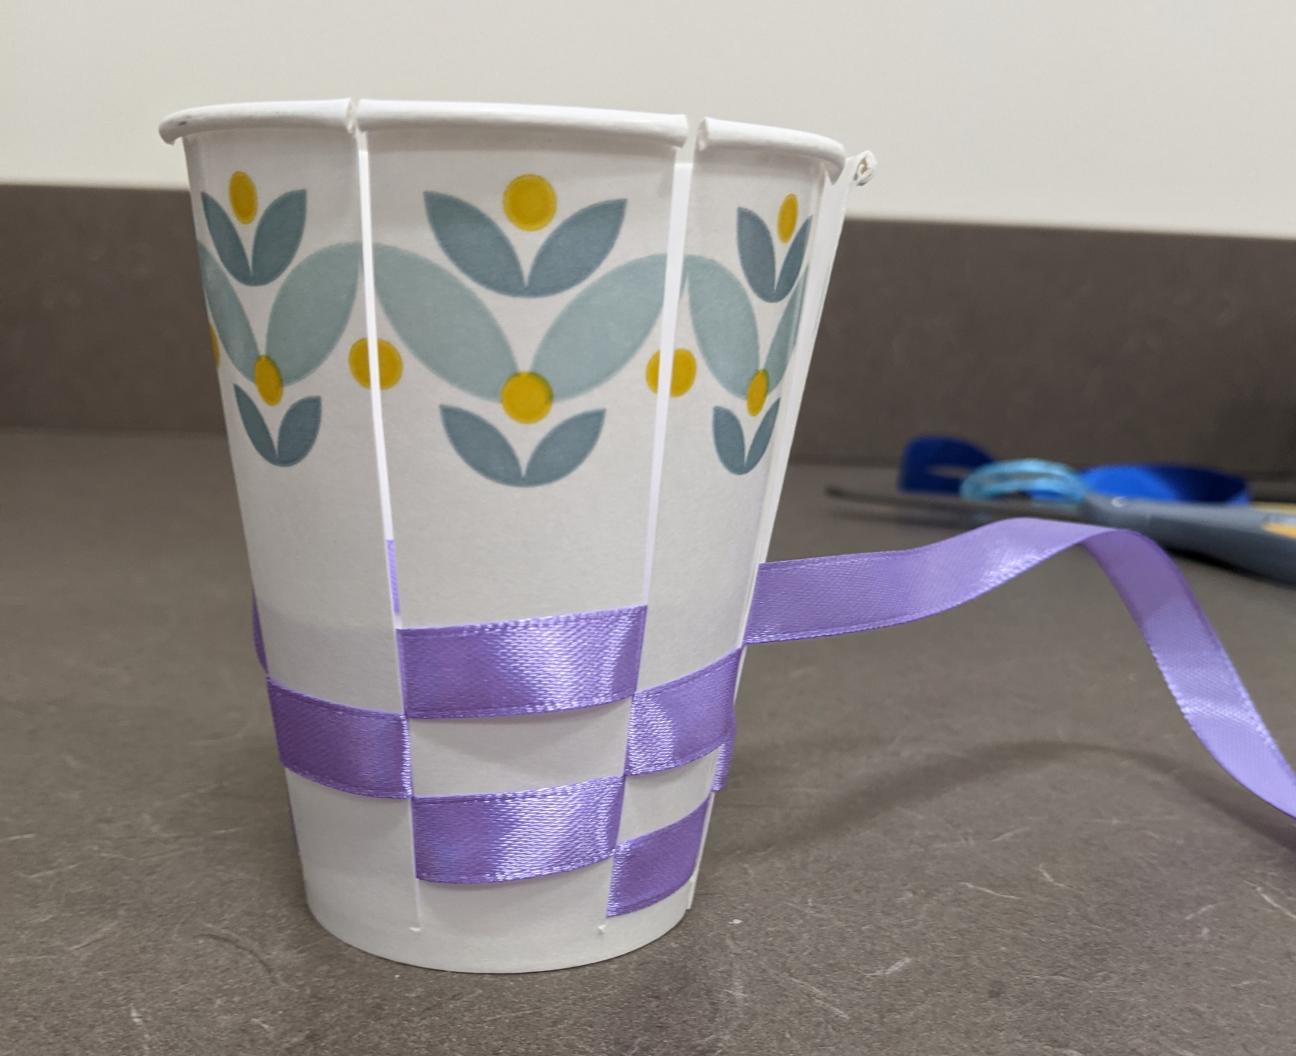
Start weaving! For my basket, I used ribbon but you could also choose yarn or paper. Ribbon will look a lot different than yarn does because ribbon is so thick that the strands won't squish together like yarn does. Parts of the cop will peek through, which can be extra cool if you have a full colored or patterned cup! You can tape down the ends of your ribbon at the beginning, if it's hard to keep it in place.
Step 3
Keep weaving until you're done! It can be hard to keep the ribbon lying flat against the cup, so take your time and pull the ribbon sort of tight as you go to keep everything in the right place.
Step 4
Finish the basket by cutting the ribbon and taping it down. You can roll the edges of the cup like we did with the basket in Style #1, or you can leave it as is. My cup had an edge on it already, so I didn't bother.
Style #3: Square Paper Basket
Supplies: cardstock (optional), color paper, scissors, pencil, ruler, glue or gluestick
Step 1
This one takes a bit more work. Start by measuring out the shape of your basket on a piece of paper and cutting it out. I've included a picture of my basket "template" below with the measurements:
- Cut the paper into a square (8.5" x 8.5")Image
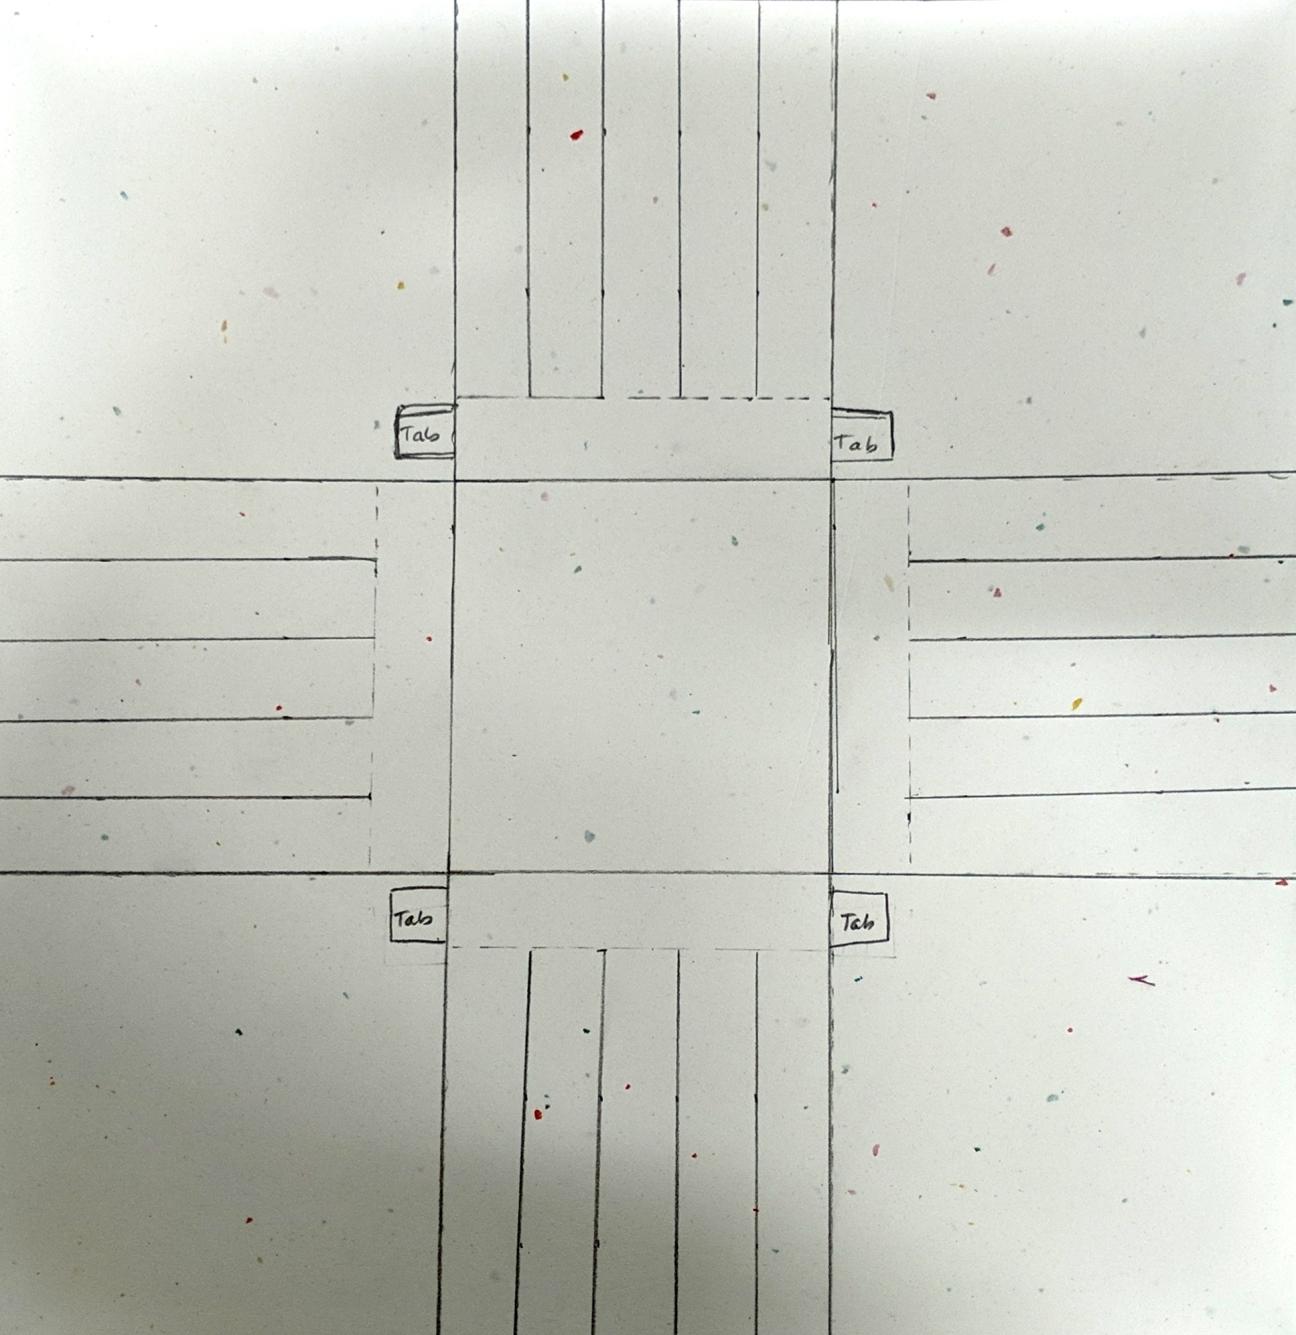
- Measure a 2.5" x 2.5" square in the middle of your paper.
- Measure a 1/2" border around the inside square
- Draw lines from the corners of the inner box to the edge of the paper.
- Draw evenly spaced lines from the border to the edge of the paper. Mine were 1/2" apart.
- Add two tabs to one of the basket sides. They should be below the line for the border. Add two more tabs on the opposite side of the basket. These tabs will keep the basket together
- Cut it all out! Only cut out the outside corners, going around the tabs, and along the lines for the flaps on each side. Don't cut through the 1/2" border from earlier.
And now you have a basket template! You can either use my measurements, make your own, or print off a copy of my template (just right click on the image, open it in a new tab, and print from there).
Step 2
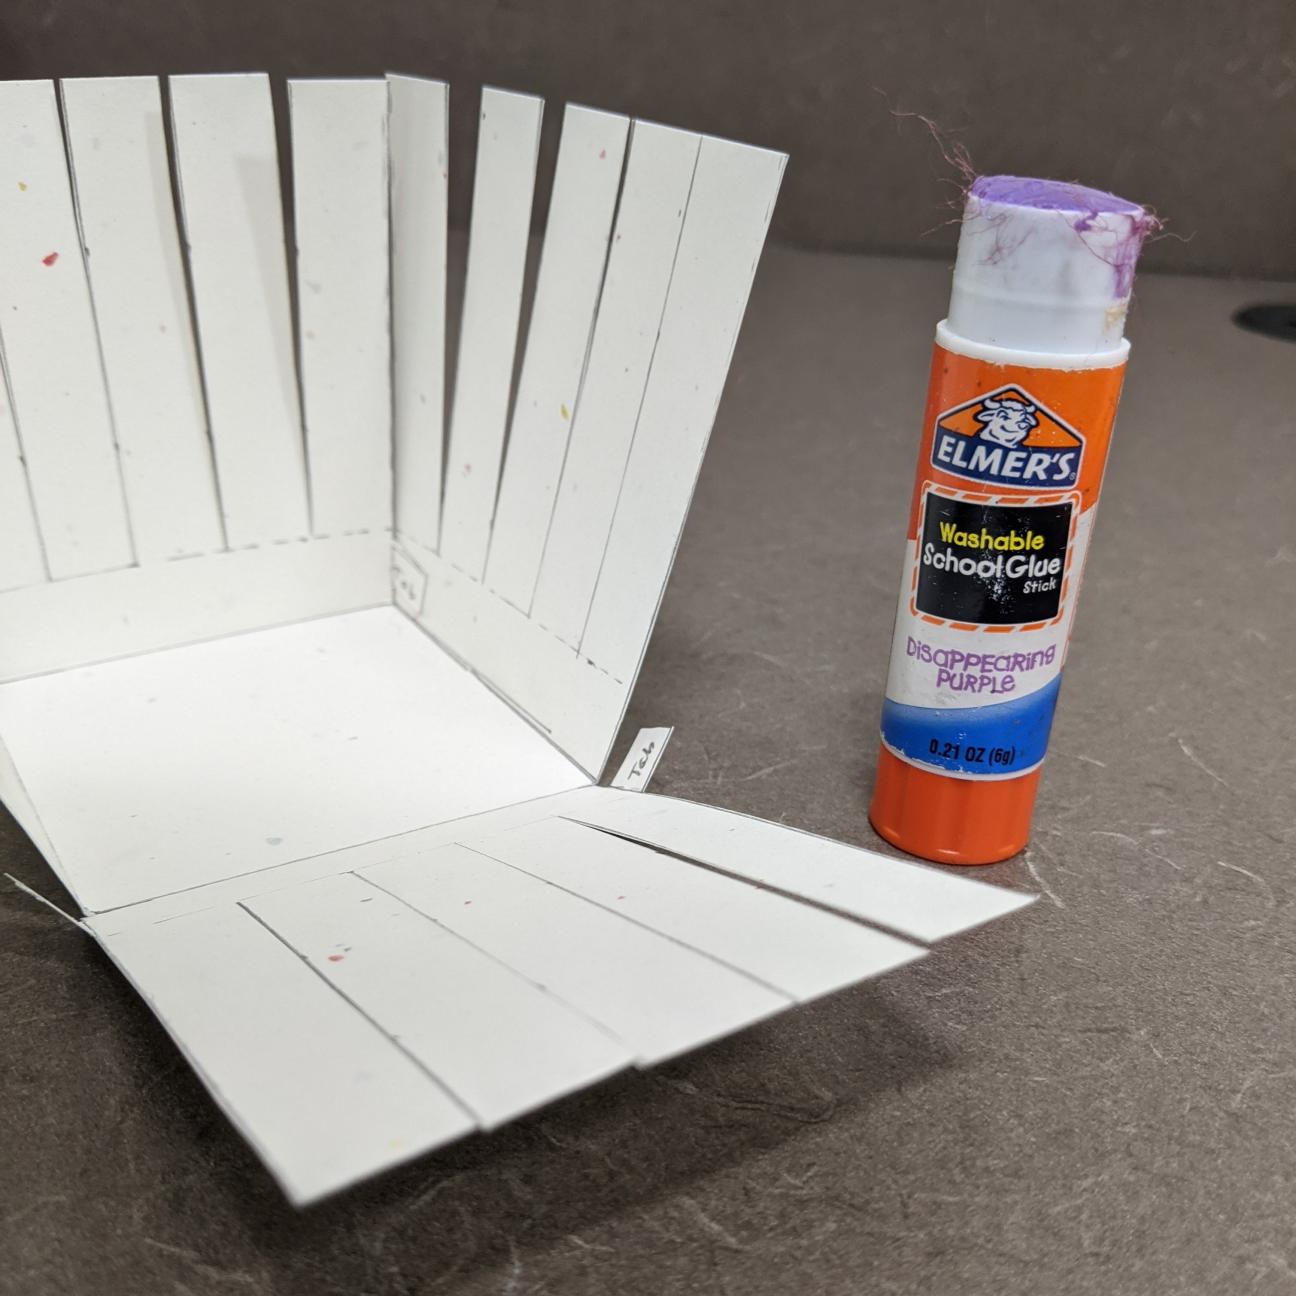
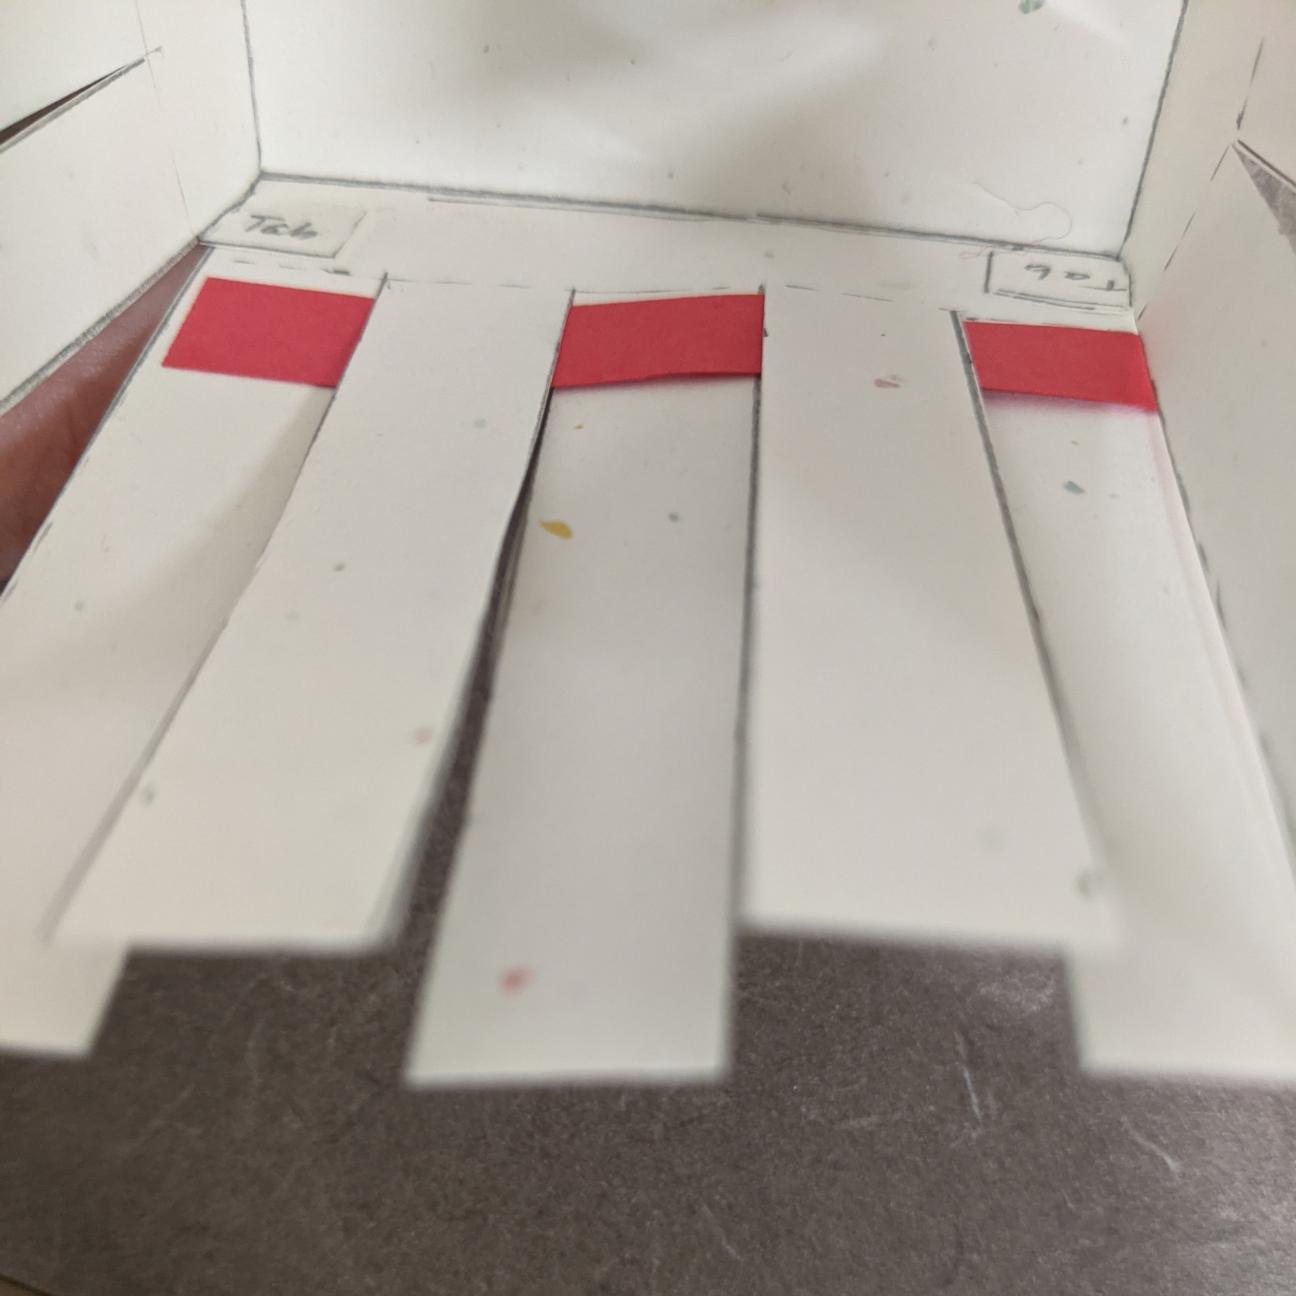
Once you have your template all cut out, use some glue or a gluestick to glue the tabs onto the inside. This will hold your basket together and make it easier to start weaving. Hold the tabs in place until it won't come apart, and then glue the other side.
Step 3
Cut strips of paper. I went with yellow, orange, and red, and cut them so they were about a centimeter wide.
Step 4
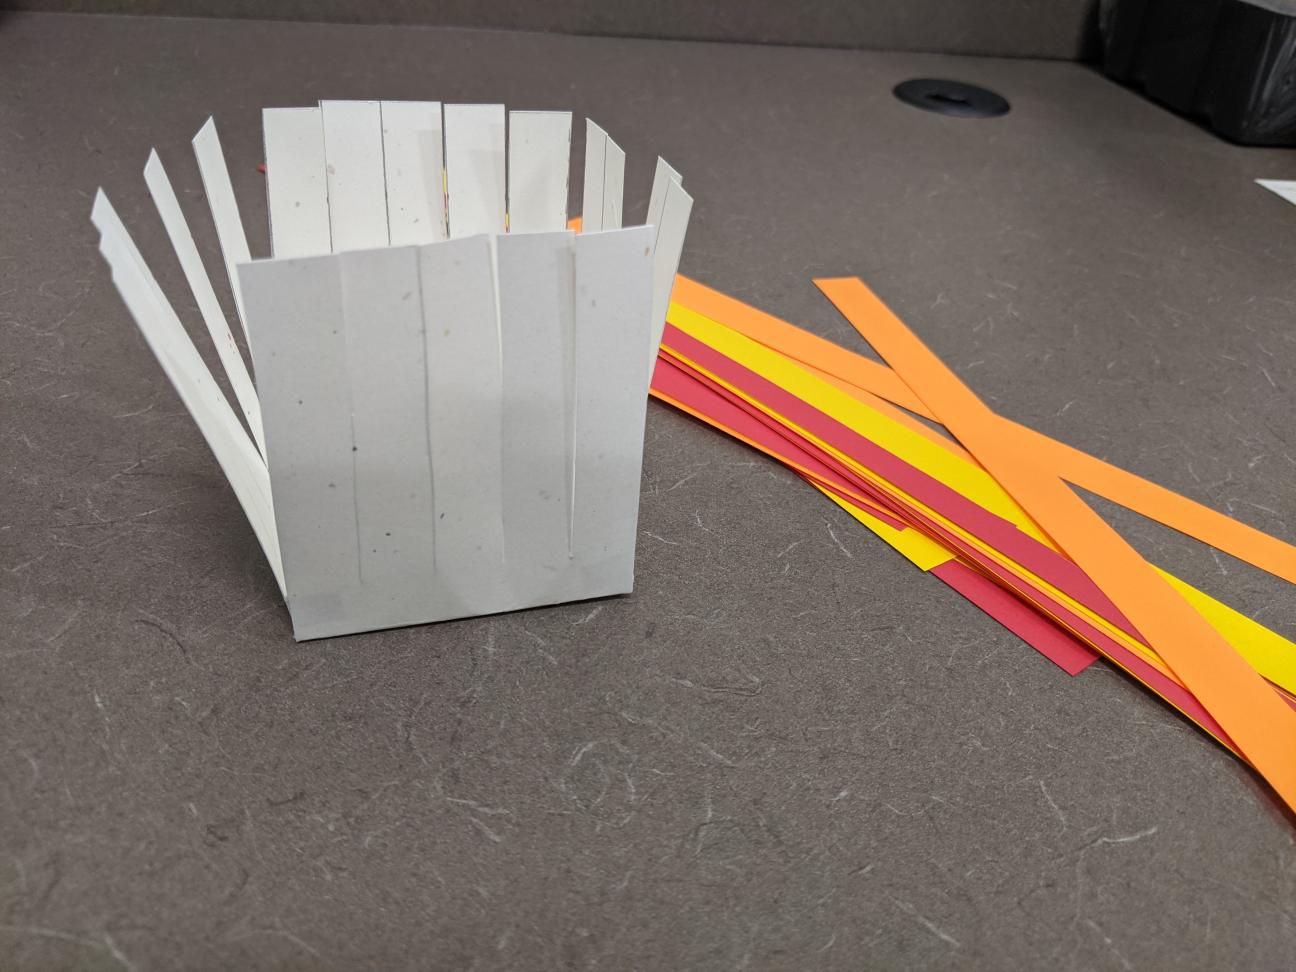
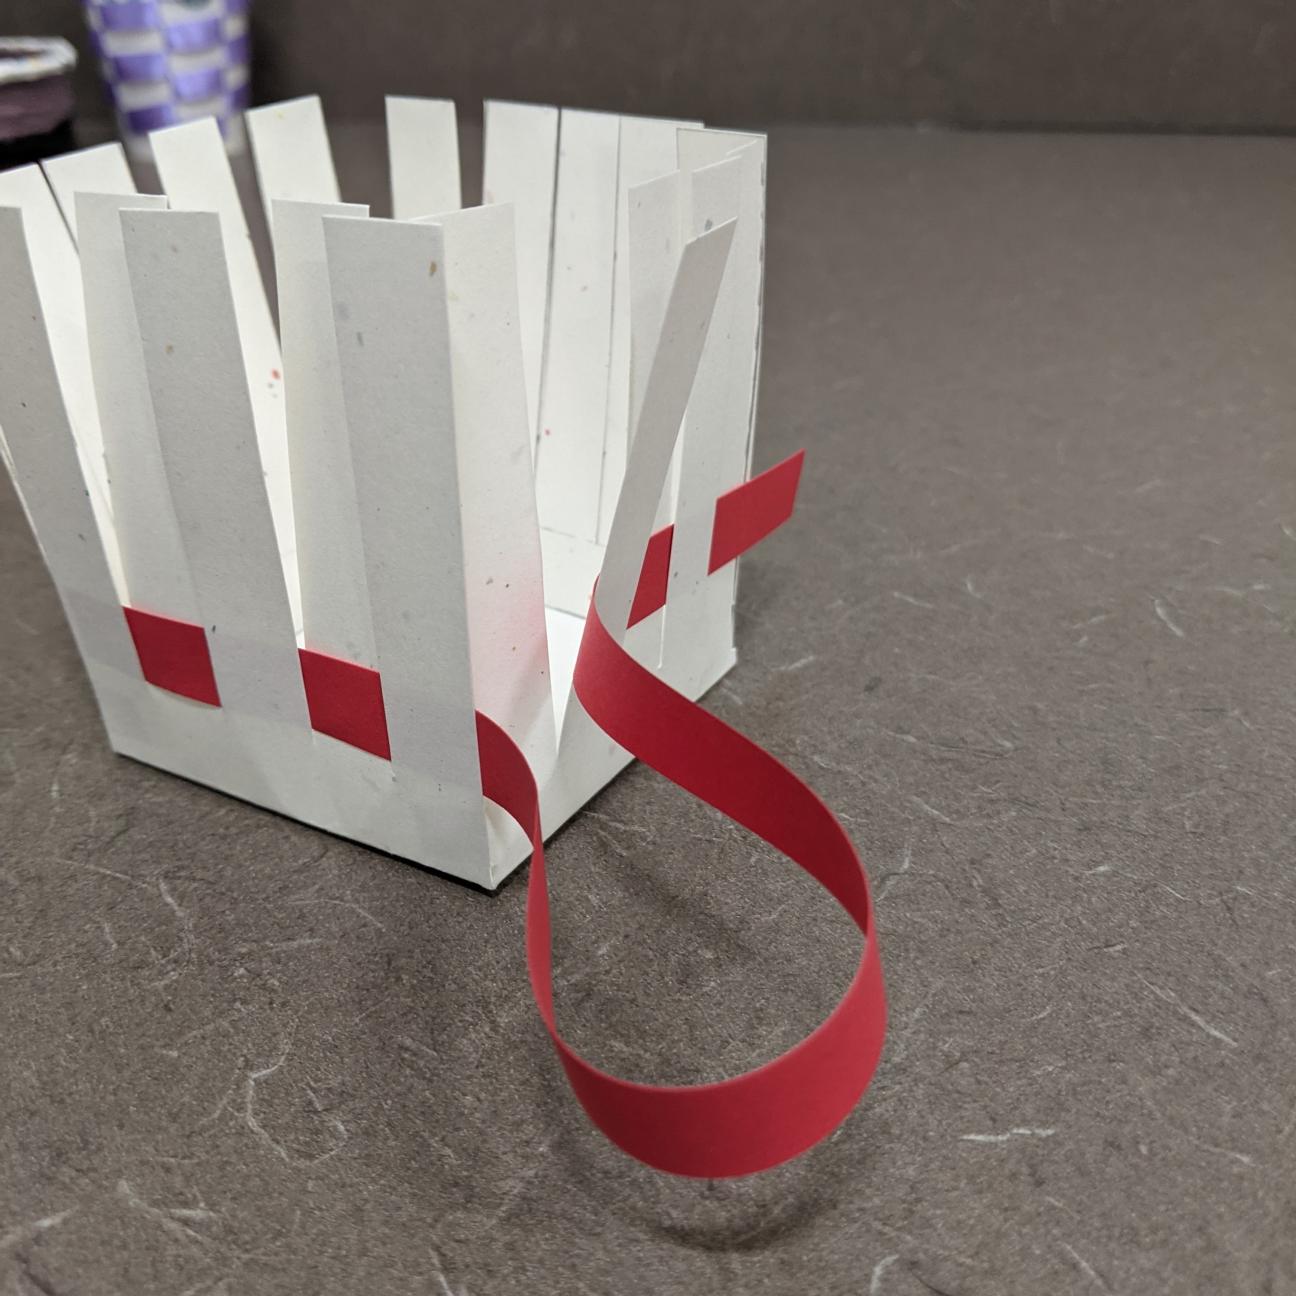
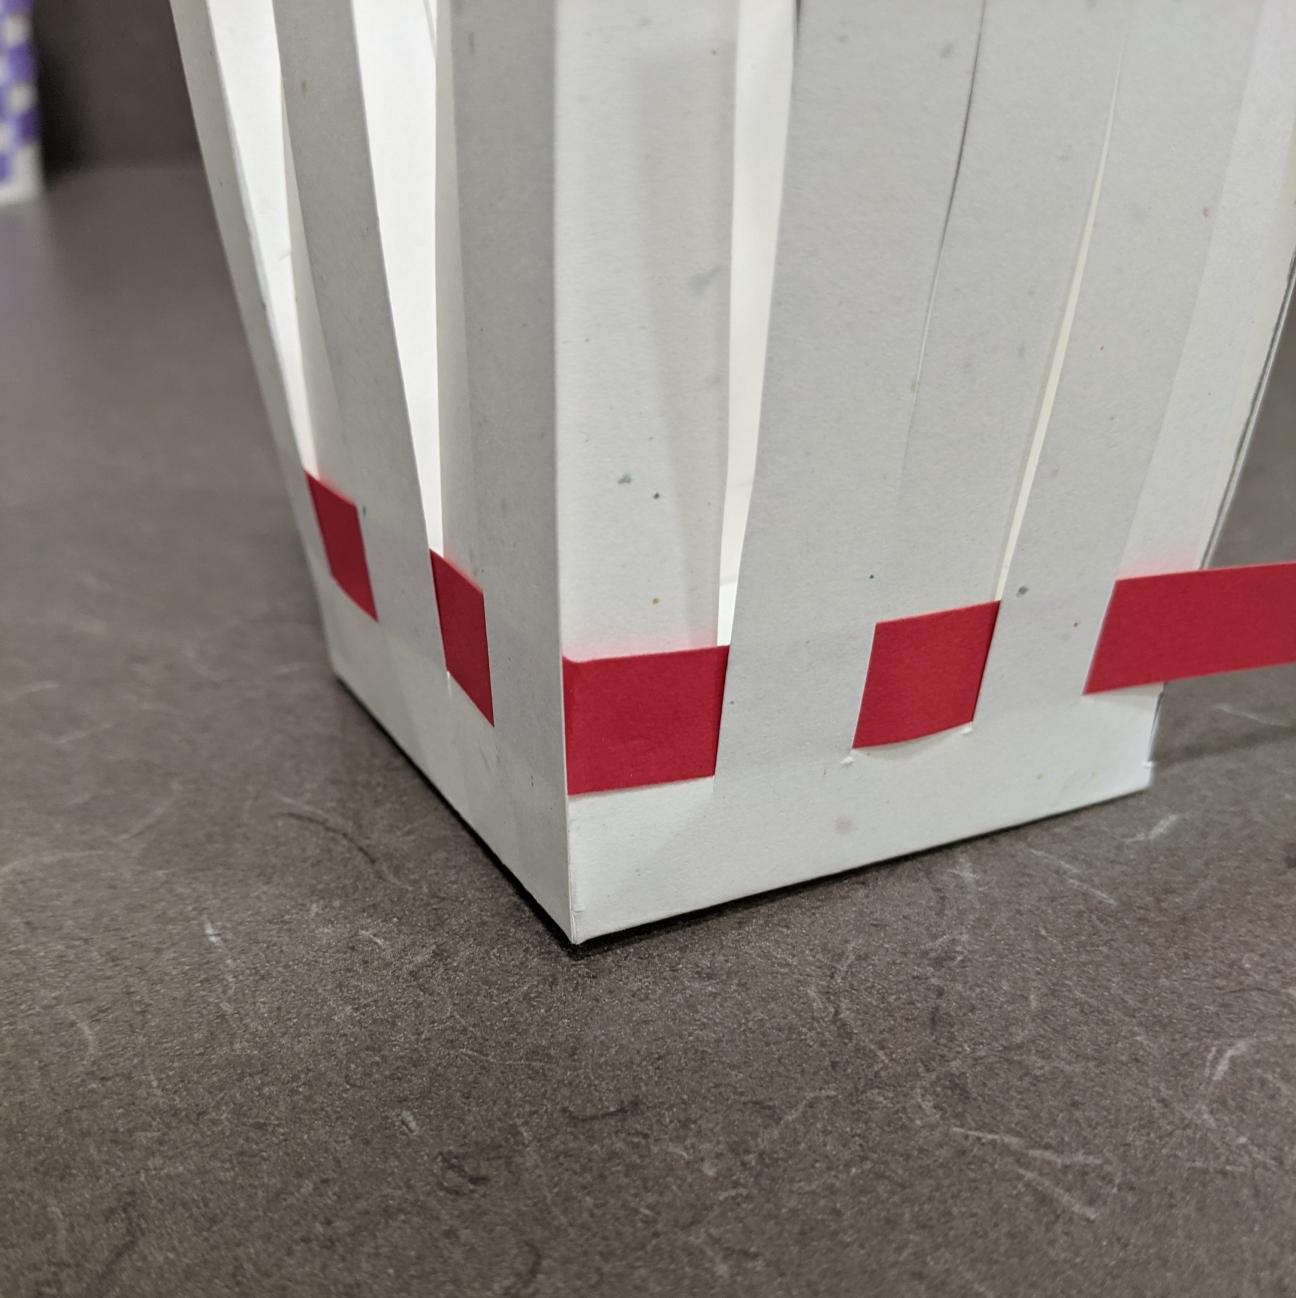
It's time to start weaving! This is done just like the other baskets. The easiest way I found to weave with paper was to use one end like a needle, and weave it through all of the slats on a side before pulling it tight. At the edge of a side, pinch the strip so it makes a crisp 90 degree angle to go to the next side.
Step 5
At the end of a row, cut your excess paper and glue/tape down the end. If you try to use the same strip for the next row, it will get crumpled and won't look good.
Step 6
Start the next row! I like to rotate to a new side for each row, to make sure my weave is alternating properly.
Step 7
When you get to the top, fold the edges of the white paper towards the inside of the basket. This gives it a nice, even top. Glue the loose edges down so the don't come up, and now you're done!
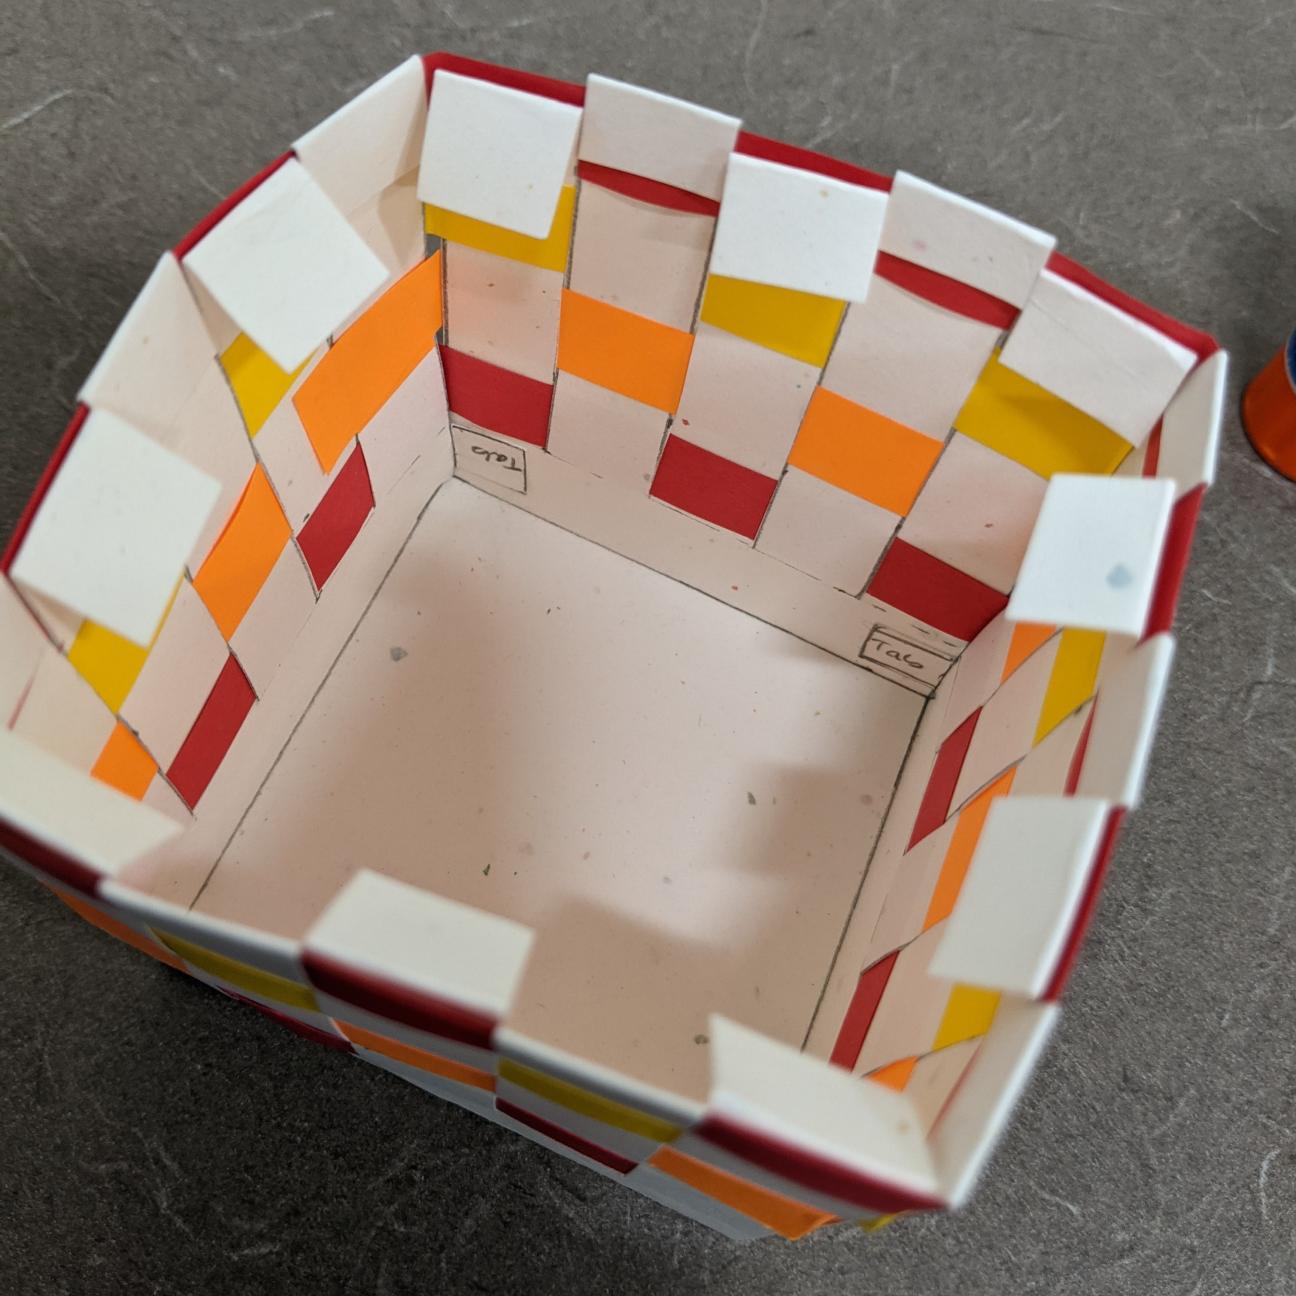
And just like that, you've created some awesome baskets! Use them to hold crayons, hair ties, or anything else that will fit!
If you're interested in more yarn-related crafts, check out these books:
